Google recently put out a post talking to the past 5 years offering the Safe Browsing program and summarized in a post titled: Google Safe Browsing Program 5 Years Old – Been Blacklisted Lately?
This got us thinking about the number of Google warnings end-users see every day, and naturally we couldn’t help but take some time to help provide some context around the different warnings and what they mean.
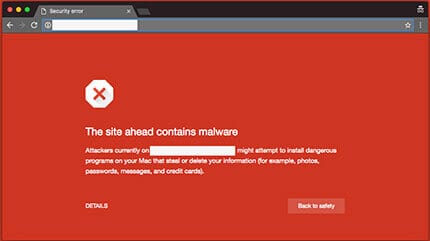
Today it seems there are 5 little words that all end-users are quickly learning to fear when it comes to owning a website:
Courtesy of Chrome
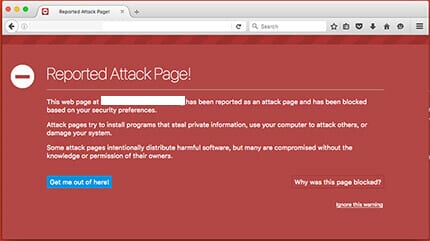
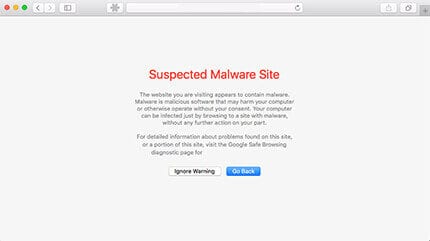
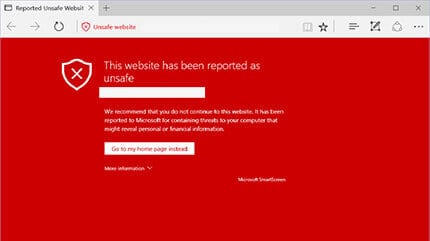
It’s important to note that every browser displays the warning a bit different. Very frustrating to us and clients, but good to recognize.
Courtesy of Firefox
Courtesy of Safari
Courtesy of IE/Edge
What Does it Mean?
What most don’t realize is that Google has a number of different warnings and they don’t all mean the same thing. If you are greeted with one of the warning splash pages above, that’s what it is, your site is infected and you should be concerned. This page is reserved to warn all users visiting your site that Google has in fact confirmed that your site is either (1) distributing malicious software, whether via drive-by-downloads, social engineering attacks, etc.. or (2) redirecting users to malicious domains or IP’s that are in turn distributing malicious software.
I know, nothing screams panic more than a page that is bright RED and forces your client to click proceed anyway or ignore warning to access your website. It’s like saying:
Hey, you’ll likely get mugged if you go in that alley.
The odds of your clients and readers disregarding the message is growing less likely every day. What makes it worse is that Google offers an API that most Anti-Virus leverage. This API is updated with the state of your site in the Google Safe Browsing program. What this in turn means is if your site gets blacklisted, that is then pushed to the API, which in turn is reported by AV’s. In short, if your client is using a product from one of the AV’s that too will warn the user that something is wrong.
Now, its easy to say, “buy our product to avoid what is quickly being recognized as the web’s scarlet letter A,” but in addition to saying that, we want to raise awareness around what you can do if you in fact find yourself with this problem.
Know The Warning
The first thing to understand is to know what warning you are seeing. There are three types of warning Google releases. They include:
- Malicious Software (Malware)
- Suspicious Activity
- Phishing
Malicious Software (Malware)
Perhaps the easiest to identify. They are all the warnings posted above. They are usually red splash pages and annoying as heck, what’s worse is they have this way of significantly impacting your websites traffic.
Suspicious Activity
Most don’t realize this but when you use Google search all the results you see are known as Search Engine Result Pages (SERPs). If Google detects something it feels to be inconsistent with your site it will display a little warning titled:
This site may be compromised!!
This is perhaps the most frustrating because unlike Malware and Phishing attempts, it’s treated differently. It’s Google saying it thinks something is amiss. You’ll often find this warning on sites with the Pharma Hack. Please understand though clearing this warning can be painful as the process is slightly different than its blacklisting counterparts.
Phishing
If you read our post on the past 5 years with Google’s Safe Browsing program you’ll notice an interesting trend where Phishing attempts are increasing while malware is decreasing according to Google. With that, it’s only appropriate for Google to put together yet another glaring splash page to warn its users of something being wrong. If you find yourself curious as to how Phishing scams work HowStuffWorks offers a good and easy to understand description.
With an understanding of which warning you ware being flagged with, and yes it could be all three, you can then put together an appropriate course of action.
Course of Action
We get this question a lot, “Is this going to be there forever?” The answer, fortunately, is no. It’s a temporary warning to the users of the site and if you take appropriate actions it’ll be removed.
Therefore, the really good news is that its only temporary, yet the better news is that we can help with Blacklist Removal.
If you would like a “DIY”, however, the first thing to know are the various sites you’ll need:
- Google Diagnostic Page (Remember to replace the site in the URL with your own)
- Google Webmaster Tools
- Google Reconsideration Tool
Here is a quick tip:
You don’t have to hire a company like Sucuri to have these warnings removed.
No company has an advantage over the other getting your site cleared by Google. Google is the only one with the ability to reindex and make the final determination on the state of the site. This means if you are able to effectively clear the infection then there is nothing stopping you from submitting for reconsideration on your own.
Here is another quick tip:
When dealing with Google warnings the best place to go to know the status is Google. Do not depend on Scanners as they use the Safe Browsing API and that is often delayed.
With this information in hand you can now work to assess where the issue is. It’s often in your interest to work to identify the issue before submitting it for reconsideration, not doing so will simply leave you stressed and frustrated. Its important to note that sometimes though, Google does make mistakes, and it could be a false positive.
Step 1. Use Live Scanners / Online Tools
Contrary to popular belief, not all scanners are created equal. More often than not, scanners use some level of caching and/or require you to subscribe to a service to get an output worth anything. Make use of free scanners where possible:
Live scanner:
These free scanners are not 100% accurate, its practically impossible. In reality, no remote service is 100% accurate. If they were, there wouldn’t be a need for any other vendors. That being said, its good to note that some malware types are conditional and present themselves only when specific rules are met. Read more on one of our recent posts, Understanding Conditional Malware – IP Centric Variation. To account for this you can use a number of tools to emulate different conditions in the hopes of replicating the issue.
Online tools:
The idea is try to figure out what might have flagged the issue in the first place. Using the Google Bot option is always good as it will display the site as it is being seen by Google. This is especially important for those infections that target Google IP’.
Step 2. Remove the Issues
As in most things, knowing is only half the battle. Now that you know you want to go in and remove the issue.
Please have a basic understanding of coding syntax, the last thing you want to do is blow up your site all because you deleted a closing bracket.
Please also note that the infection may be encoded, encrypted, concatenated or a little bit of everything. In other words, what you see via the web might not be what you see when you log into your server. With that being said there are a few known places you can always look when hunting down issues:
Some of the more common places to look when dealing with drive-by-downloads:
- Footer
- Header
- Index (php or html)
- template files
More common places for malicious redirects include:
- .htaccess
- index (php or html)
- Core Files
When dealing with Phishing attempts:
- New Directories
- HTML files
- Index (php or html)
Another good tip is that although Google Webmaster Tools might say myhapylizard.html and mykidsplaying.html are showing infected, in reality its the core file generating the content for those files that is the culprit. Looking only at those HTML files is not going to bear you much fruit. Look at the files generating the template for that page, there you’re likely to find the root of the problem. You’ll also want to know what your website is built on. Is it using a CMS like WordPress, Joomla, Durpal, or osCommerce? Is it custom?
If you’re familiar with the command line interface (CLI) you can also try using a few different commands.
Emulate user agents:
$ curl -A “Mozilla/5.0 (compatible; MSIE 7.01; Windows NT 5.0)” http://www.somesite.com
Where you can switch out the agent MSIE 7.0; Windows NT 5.0 at your leisure. It’s always good to check IE as it’s one of the more likely targeted browsers. If you go online and try searching for user agents it could be a bit overwhelming. As you get familiar with them, here is a sweet little list that will help you get going. Simply replace the content in the user agent section of the cURL command.
You can also use cURL to emulate a number of bots and other crawlers.
Emulate bots:
$ curl –location -D – -A “Googlebot” somesite.com
If you’re wondering why you would ever use cURL in the place of your browser, the answer is simple, you don’t want to visit a compromised site and run the risk of compromising your own environment. You’re going to want some understanding of how your website was developed and a basic understanding of HTML at a minimum. To help you out, you’re looking for things that might have something like the following:
- iframe
- script
You’re also going to look for things that don’t make sense:
- Is your site English, but you see Russian writing? Or any language not your own?
- Do you see long strings of incomprehensible content?
Once you do that you’ll want to become friends with grep. Sample use would be:
$ grep -r ‘[something of interest]’ .
Grep is extremely powerful and allows you to crawl your entire environment. It allows you to pick out pieces of text and search for it in every file on your server. Be sure to check out the 15 tips on how to use the command. Another good resource to help you get acclimated in the terminal environment includes this free online resource.
Step 3. Submit For Review
If you made it through Step 2 then you’re likely pretty pumped right now, and you should be. Only thing left to do is submit to Google for reconsideration. Regardless of which warning you’re fighting with, you’re going to do some type of reconsideration submission. For all of them, you’ll need to log into Google Webmaster Tools and verify your site.
For malicious software (Malware) and Phishing warnings you will submit the reconsideration request via Google Webmaster Tools by:
- – Add Site
- – Verify Site
- – Click on Health option – Hint: Left side table of content
- – Click on Malware – Hint: If being flagged for Phishing or Malware you’ll see a yellow / orange warning on the page when you click
- – Click to submit a review
For suspicious activity you’ll follow these steps:
- – Add Site
- – Verify Site
- – Go to the Reconsideration Link
- – Select your site from the drop down
- – Fill in the input boxes, provide as much information as possible
After both, the best thing you can do is sit back and wait. This is a patience game. In most instances you’ll see an update within 10 hours, but in some instances it has been known to take days if not weeks (rarely). Also, be sure to keep an eye on your Google Webmaster account, you’ll see update notices there and in your email.
If you get to the point where you have exhausted all your resources and can’t manage to get the infection removed, then it’d be in your interest to engage with a malware remediation company like Sucuri. If you decide on another provider, that’s ok too, be sure to read our Ask Sucuri: What should I know when engaging a Web Malware Company? post.
If you have any questions on the content in this post please feel free to leave a comment or send us an email at info@sucuri.net .


2 comments
Comments are closed.