File permissions might seem like a small part of managing a WordPress site, but they play a key role in your website’s security and functionality. Incorrect permissions can leave your site vulnerable to attacks, while overly restrictive settings can hinder its operation.
This guide is designed to walk you through the essentials of WordPress file permissions, from basic concepts for beginners to advanced configurations for tech-savvy users. By the end of this post, you’ll be equipped to set, manage, and troubleshoot file permissions like a pro.
Contents:
- File permissions basics
- Setting up your file permissions
- How to change your file permissions
- Recommended permissions for WordPress
- Ownership and group settings
- Troubleshooting common permissions issues
- Best practices for maintaining your permissions
File permissions basics
To begin, let’s take a look at the basics of file permissions and how they affect your website’s security.
What are file permissions?
File permissions are rules used by your server to determine who can read, write, and execute files on your website. Used in Linux server environments, these permissions are especially useful for protecting your site’s files and directories from unauthorized access and manipulation.
Linux, an open-source operating system, is widely favored in the hosting world for its stability and security features. This guide primarily addresses file permissions in Linux, as the rules and methods differ on Windows hosting environments.
How permissions affect your WordPress security
Correct file permissions can help safeguard your site by limiting interactions with your files.
For example, setting the wrong permissions on a crucial file like wp-config.php could allow unauthorized users to view or modify sensitive information, leading to security breaches and compromise.
Basic permission settings explained
First, let’s take a look at some common permissions:
- Read (4): Allows content to be read or viewed.
- Write (2): Permits content modification or deletion.
- Execute (1): Allows running the file as a program or script.
Each number corresponds to a level or combination of permissions. In fact, there’s number defined for each possible levels of file permissions, like so:
| Number | File Permission |
| 0 | No access |
| 1 | Execute |
| 2 | Write |
| 3 | Write and execute |
| 4 | Read |
| 5 | Read and execute |
| 6 | Read and write |
| 7 | Read, write and execute |
These permissions can be set individually or combined for different types of users:
- Owner: The user who owns the file.
- Group: Users who are part of a defined group.
- Public: Everyone else.
Understanding these basics is the first step towards configuring your WordPress site securely (and efficiently). As we progress, we’ll dive deeper into how you can apply these principles effectively across your site’s architecture.
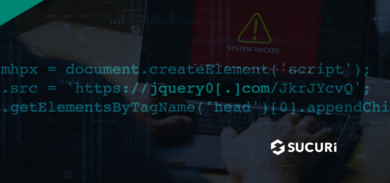
Can website malware affect your file permissions?
Some website malware infections are known to change the file permissions for index.php and .htaccess to 444, essentially locking the files down and attempting to prevent the automated removal of malware.
If you believe a malware infection has tampered with your website file permissions and you need a hand, reach out and chat — our experienced security analysts are available 24/7 to assist with problematic and persistent website infections.
Setting up your file permissions
Next, let’s take a closer look at what you need to set up and check file permissions in your website environment.
Tools and access required
To manage WordPress file permissions, you’ll need access to tools like FTP clients, cPanel, or SSH terminals, depending on your hosting setup. Ensure you have the correct credentials to access these tools, as you’ll need them to view and modify file permissions.
Step-by-step guide to checking current file permissions
Next, let’s review the steps you can take to check file permissions using cPanel, FTP and SSH.
cPanel
- Log in to your cPanel account: Navigate to your hosting provider’s website and log into your cPanel.
- Open the File Manager: In the cPanel dashboard, find and open the File Manager under the Files section.
- Navigate to your WordPress Directory: Locate and click on the directory where WordPress is installed, usually labeled as public_html or directly as your website’s name.
- Check your permissions: Right-click on any file or folder and select Permissions. A dialog box will appear showing the current permission settings in a numeric format (e.g., 0644).

FTP
- Connect to your server: Open your FTP client (like FileZilla) and connect to your server using the FTP credentials provided by your hosting service.
- Access your WordPress files: Navigate to the directory where your WordPress is installed.
- View your permissions: Right-click on any file or folder, and choose File permissions… A window will pop up showing the numeric permission value and checkboxes for read, write, and execute permissions.

SSH
- Access your server: Open your terminal or SSH client and connect to your server using the SSH command: ssh username@yourserver.com
- Navigate to your WordPress directory: Once connected, change directory to where your WordPress is located: cd path/to/your/wordpress
- List files with permissions: Run the command ls -l to list files along with their permissions and ownership details in the terminal.
- Review the output: The output will show permissions in a string format (e.g., -rw-r–r–), where the first character indicates the type of item (– for file and d for directory), followed by three sets of characters representing read, write, and execute permissions for the user, group, and others.
How to change your file permissions
Next, let’s take a look at the steps you can take to modify and change your file permissions using cPanel, FTP and SSH.
cPanel
- Access the File Manager: Log into your cPanel and open the File Manager under the Files section.
- Locate the file or directory: Navigate to the WordPress directory and locate the file or folder for which you want to change permissions.
- Change the permissions: Right-click on the file or folder and select Change Permissions. A new window will appear where you can check or uncheck the boxes for Read, Write, and Execute permissions for User, Group, and World.
- Save your changes: Click the Change Permissions button in the dialog to apply the new settings.
FTP
- Connect to your server: Open your FTP client and connect using your FTP credentials.
- Find the file or directory: Navigate to the WordPress directory and find the file or folder you wish to modify.
- Modify your permissions: Right-click on the selected file or folder, choose File Permissions or Properties. You can then adjust the numeric value or check the appropriate permissions boxes.
- Apply the changes and close: Click OK to apply the changes. The new permissions will take effect immediately.

SSH
- SSH into your server: Use the command ssh username@yourserver.com to log into your server.
- Navigate to the file or directory: Change to the directory containing the file or folder with cd path/to/your/wordpress.
- Change your permissions: Use the chmod command to set the desired permissions. For example, chmod 644 filename to set read and write permissions for the user, and read-only for group and others.
- Verify the permission changes: Run ls -l to see the updated permissions displayed beside the files.
These tools and steps can help you ensure your WordPress files and directories have the appropriate permissions set.
Recommended permissions for WordPress files and directories
In general, the best practice for WordPress file permissions is as follows:
- Files: Set permissions to 644. This setting allows the file owner to read and write the file, while everyone else can only read.
- Directories: Use 755. This allows the file owner to read, write, and execute (navigate) the directory, while others can only read and execute.
Permissions for wp-config.php, .htaccess, and wp-content
- wp-config.php: The w-config.php file contains sensitive information and should be set to 600 to restrict access only to the file owner, enhancing security.
- .htaccess: Your .htaccess file should be set to 644 to prevent unauthorized modifications but allow necessary access.
- wp-content: This directory can remain at 755 to enable proper functionality of themes, plugins, and uploads.
Special considerations for shared hosting environments
In shared hosting environments, where multiple sites are hosted on a single server, it’s really important to be vigilant about file permissions to avoid unauthorized access.
Beyond checking and ensuring your permissions are restrictive enough to prevent unauthorized changes, we also recommend consulting with your hosting provider to understand any additional security measures that may be necessary to protect your website environment.
Ownership and group settings
Ownership and groups play an important role in the security of your WordPress files. Owners have full control, while groups can be assigned specific permissions that cater to their role in website management.
Here’s how to ensure proper settings for your WordPress website:
- Use the chown command (in SSH) to change file and directory ownership, for example: chown user:group filename
- Regularly review and adjust ownership based on changes in administration or hosting environments.
This is particularly important for users who manage their own VPS. We’ve put together a useful guide on how to use PHP-FPM to secure a VPS environment.
Setting up strict permissions for sensitive website files
For highly sensitive data, consider tightening permissions beyond the general recommendations:
- Set core WordPress files to 640 to prevent group and public access.
- Configure your .htaccess and wp-config.php files with the strictest permissions possible, considering your hosting setup’s requirements and limitations.
This proactive approach to your WordPress file permissions can help mitigate potential vulnerabilities and strengthen your site’s defense against attacks.
Troubleshooting common permission issues
Troubleshooting permissions starts with understanding where to look. Server and WordPress error logs are invaluable resources that offer insights into permission errors. These logs typically highlight which files or directories are causing issues, guiding you toward specific corrective actions. Additionally, diagnostic plugins for WordPress can scan your site for permission discrepancies, suggesting automated fixes that streamline the process.
Configuring permissions in a multi-user environment
Maintaining a secure multi-user environment requires careful management of file permissions.
You’ll want to set permissions that are restrictive enough to prevent unauthorized changes while still allowing enough access for necessary website maintenance. Properly configured group permissions facilitate collaborative work by defining clear access boundaries, ensuring that users only have the permissions they need to perform their roles.
Best practices for maintaining your file permissions
Regular permission audits are really important for long-term website security. Making time for audits can help to ensure that permissions remain appropriate as your site evolves, particularly after updates or the installation of new plugins or themes. Security plugins that alert you to unauthorized permission changes can also be an essential part of your security strategy, enabling you to respond quickly to any potential security breaches.
We’ve now covered everything you need to know about setting and maintaining secure WordPress permissions. Applying these insights will strengthen your site’s defenses against unauthorized access.
That being said, security maintenance is an ongoing effort — and updating your permissions regularly is a key part of this process. For added security, consider integrating Sucuri’s website firewall and monitoring services. These services provide an extra layer of security, actively scanning and protecting your website from threats while alerting you to potential issues.
Our experienced analysts are available 24/7 to answer any of your questions. Reach out — we love to chat!