Moving a WordPress website from HTTP to HTTPS should be a priority for any webmaster. Recent statistics show that over 33% of website administrators across the web use WordPress and many of these websites have still not added an SSL certificate.
Why is Important to Have a WordPress SSL Certificate?
SSL has become increasingly important in the past couple of years, not only for securely transmitting information to and from your website, but also to increase visibility and lower the chances of being penalized by website authorities.
Having an SSL certificate on WordPress should be part of the website’s security posture.
SSL Certificates Protect Data in Transit
SSL certificates help protect the integrity of the data in transit between the host (web server or firewall) and the client (web browser). They work as a barrier to prevent data visibility or modification.
However, SSL does not protect the website from a hack. If you want to understand how SSL works, feel free to watch this short webinar: Is SSL Enough to Secure Your Website?
Google Penalizes HTTP Websites
Website authorities have been penalizing non-HTTPS websites. In 2017, Google changed its approach to dealing with HTTP websites. Before, having an SSL certificate was important for the SEO and to the security community. Now, it represents that the website takes security seriously.
Google Chrome Browser version 68, released in July 2018, shows a “Not Secure” warning for websites that do not have an SSL certificate.

HTTPS Websites Have Better SEO Rankings
HTTPS websites tend to rank better on Google. Since 2014, SSL has been a ranking signal for SEO. It is one of the website characteristics that determine a website’s position in the search engines.
According to Yoast,
“It’s inevitable that we are moving to an all-HTTPS web.”
How to Add SSL Certificate to WordPress Websites
In order to install an SSL certificate on a WordPress website, you would need to either purchase one from a certificate authority, such as GoDaddy, or use a free certificate from Let’s Encrypt.
Some hosting companies provide SSL certificates to their customers. We advise you to contact your hosting company before proceeding. They can also support you with the installation and management of your certificate.
If you choose to go with a free WordPress SSL certificate, we have written an extensive guide that instructs you on how to add a Let’s Encrypt SSL certificate to any website.
If you are using the Sucuri Website Firewall (WAF), even if you do not have an SSL certificate on the origin server for your WordPress installation, SSL will be enabled on your firewall servers by default. This ensures the data is encrypted between visitors and the page they view via the firewall server.
How to Install SSL/HTTPS in WordPress
Before installing SSL/HTTPS in your WordPress website, you need to have a valid SSL certificate uploaded to your server or CDN. You can reach out to your hosting or CDN provider to ask for help with this step.
Here are the steps to installing SSL/HTTPS to a WordPress website. You can do it manually or use a plugin to help you. If you choose to add SSL to WP manually, you will need to modify some files and troubleshoot some issues.
Step 1 – Back up the website
Before starting this process, we highly advise you to back up your website in a secure location. Make a complete copy of your website files and database so that the website can be restored if any of the steps break the website.
Step 2 – Download a WordPress SSL Plugin
One of the most used plugins to move from HTTP to HTTPS is the Really Simple SSL Plugin. This plugin automatically detects new website settings and configures it to run over HTTPS.
Download the plugin from the WordPress official repository.
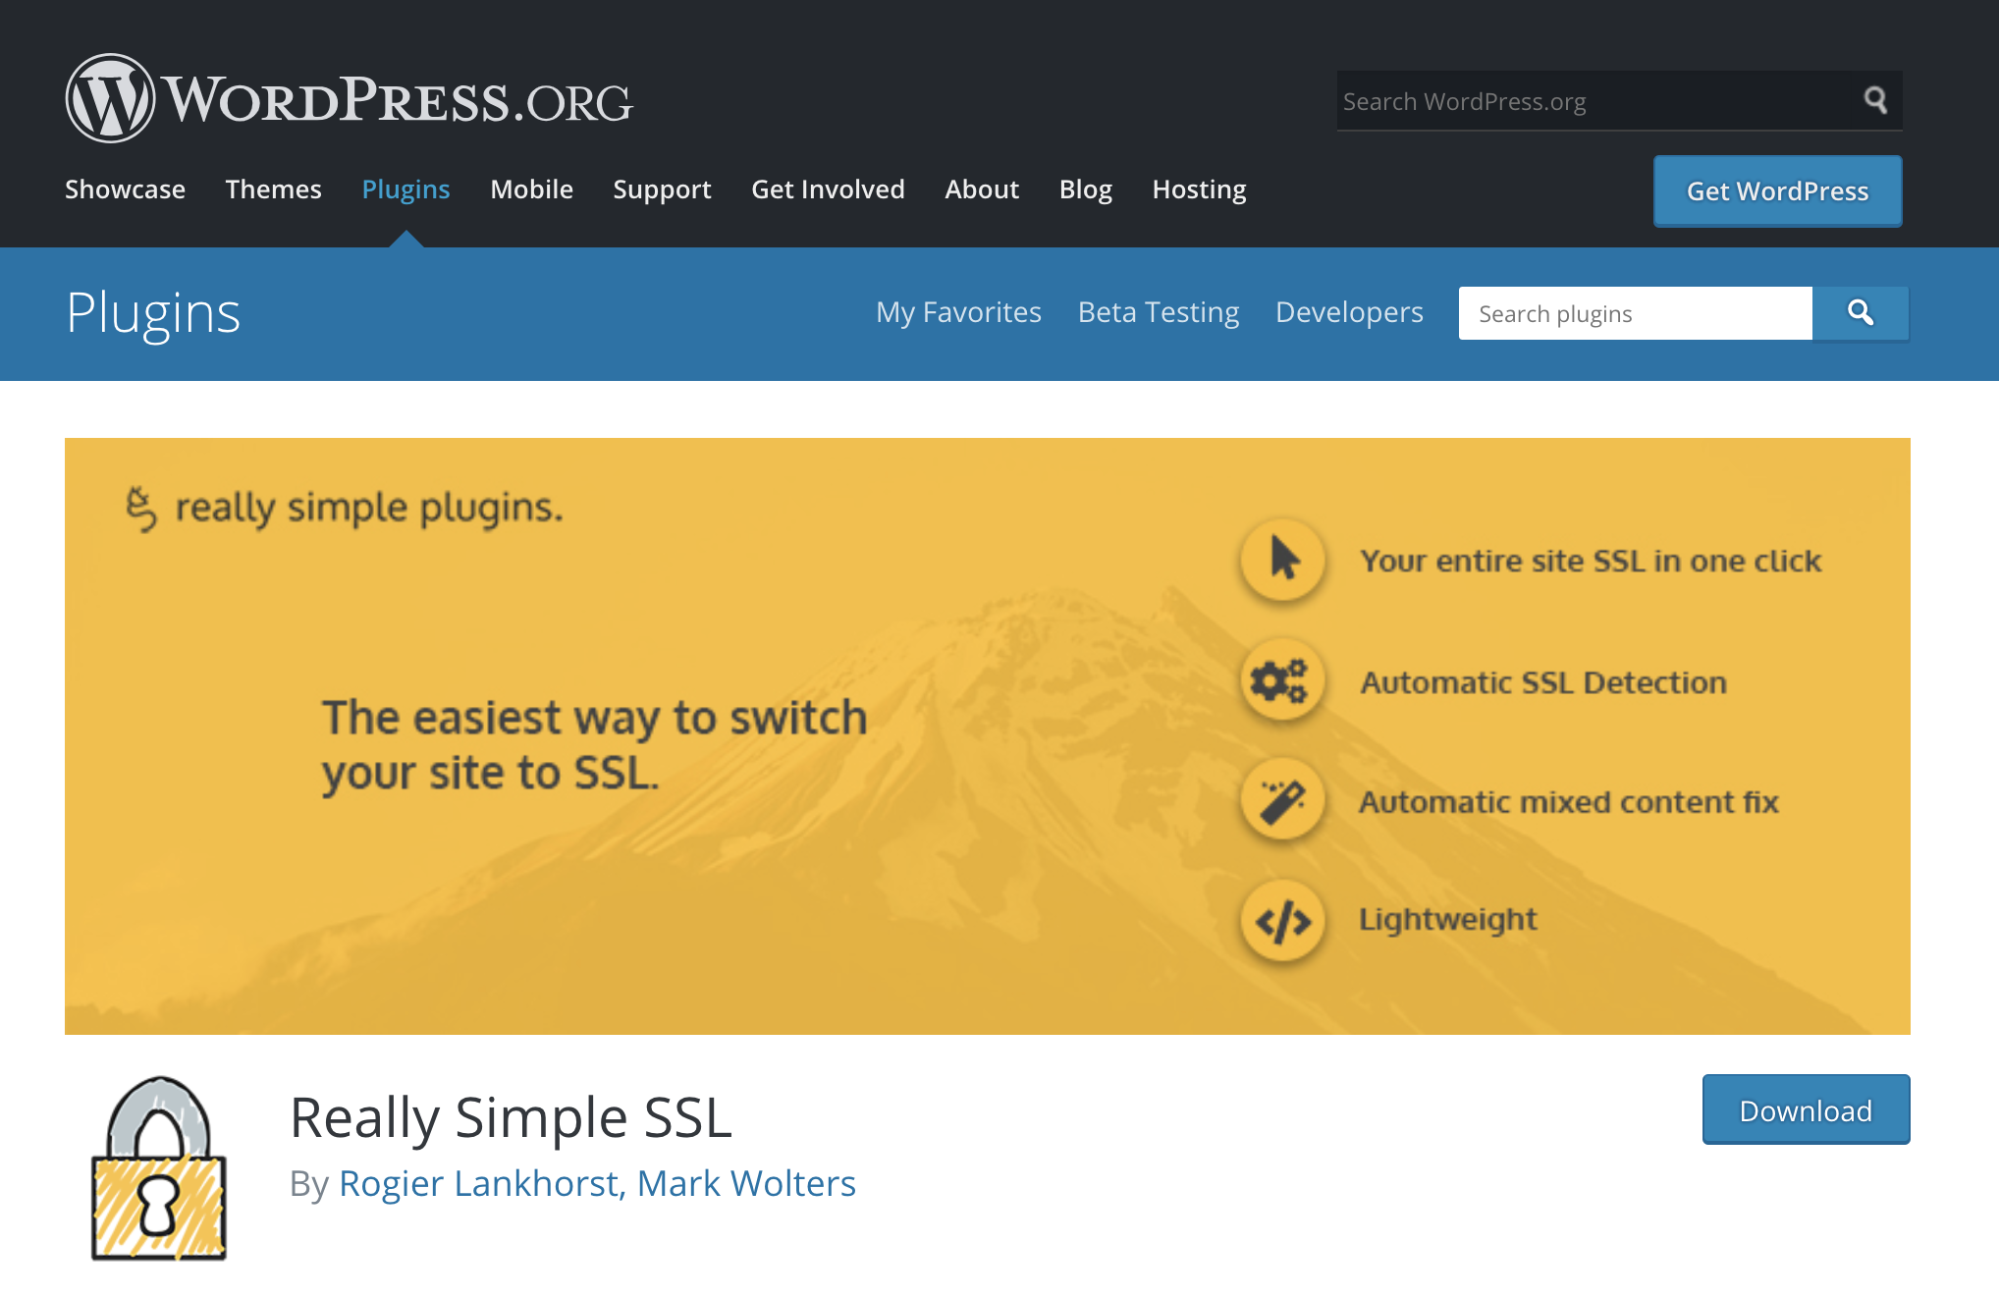
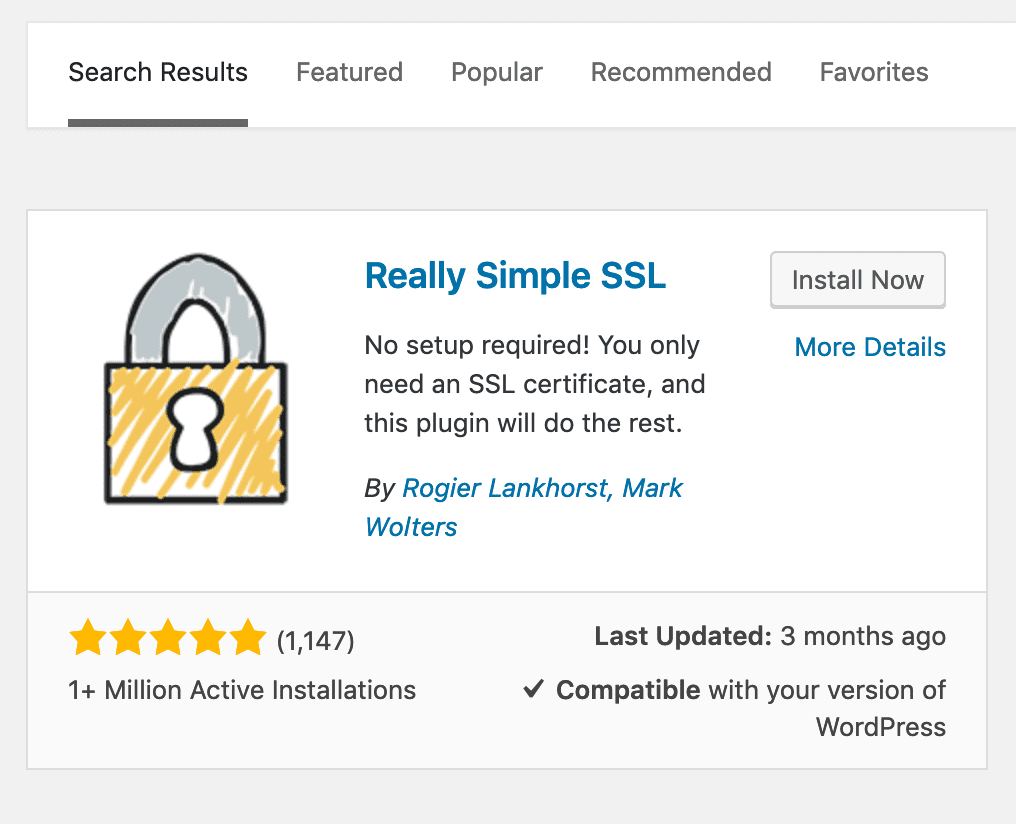
You can also install it directly from the WordPress dashboard. Go to Plugins > Add New.
Step 3 – Automatically Detect SSL Certificate with the Plugin
The plugin will automatically detect your SSL certificate and set WordPress to use HTTPS. Open the plugin Really Simple SSL in your WordPress dashboard, then navigate to Settings > SSL.
Your WP site should be running on HTTPS in one click after you click on “Go ahead activate SSL!”.
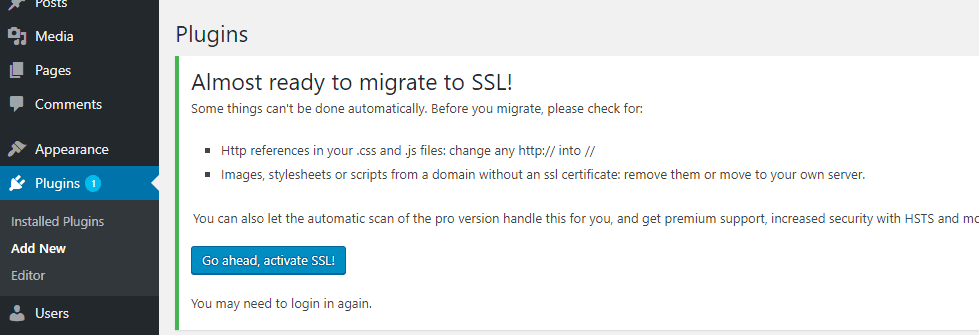
After you click on the “Go ahead, activate SSL” button, you might need to log in again to WordPress.
If you have mixed content warnings, read this article for further instructions.
PS: If you have decided to use the plugin, skip to Step 8.
Step 4 – Update the URL Address
In your WordPress dashboard click on Settings > General.
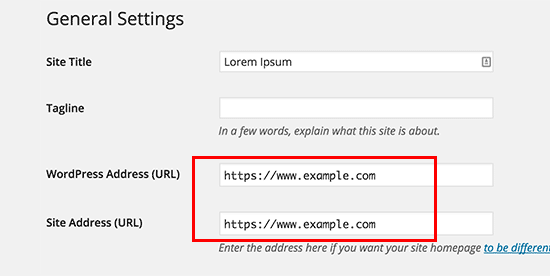
Replace your website address from http:// to https:// and click on Save Changes.
After making the changes, log out and log into WordPress.
Step 5 – Force HTTPS in WordPress
Next, force HTTPS by editing your .htaccess file. Add this code to your file:
RewriteEngine On
RewriteCond %{HTTPS} off
RewriteRule ^(.*)$ https://%{HTTP_HOST}%{REQUEST_URI} [L,R=301]
If you are using NGINX, edit your nginx.conf configuration file by adding the following lines of code:
server {
listen 80 default_server;
listen [::]:80 default_server;
server_name _;
return 301 https://$host$request_uri;
}
Step 6 – Add HTTPS to WP Admin
You can force HTTPS to your WordPress admin area by editing the wp-config.php file with the following line:
define('FORCE_SSL_ADMIN', true);Step 7 – Force HTTPS to your Database
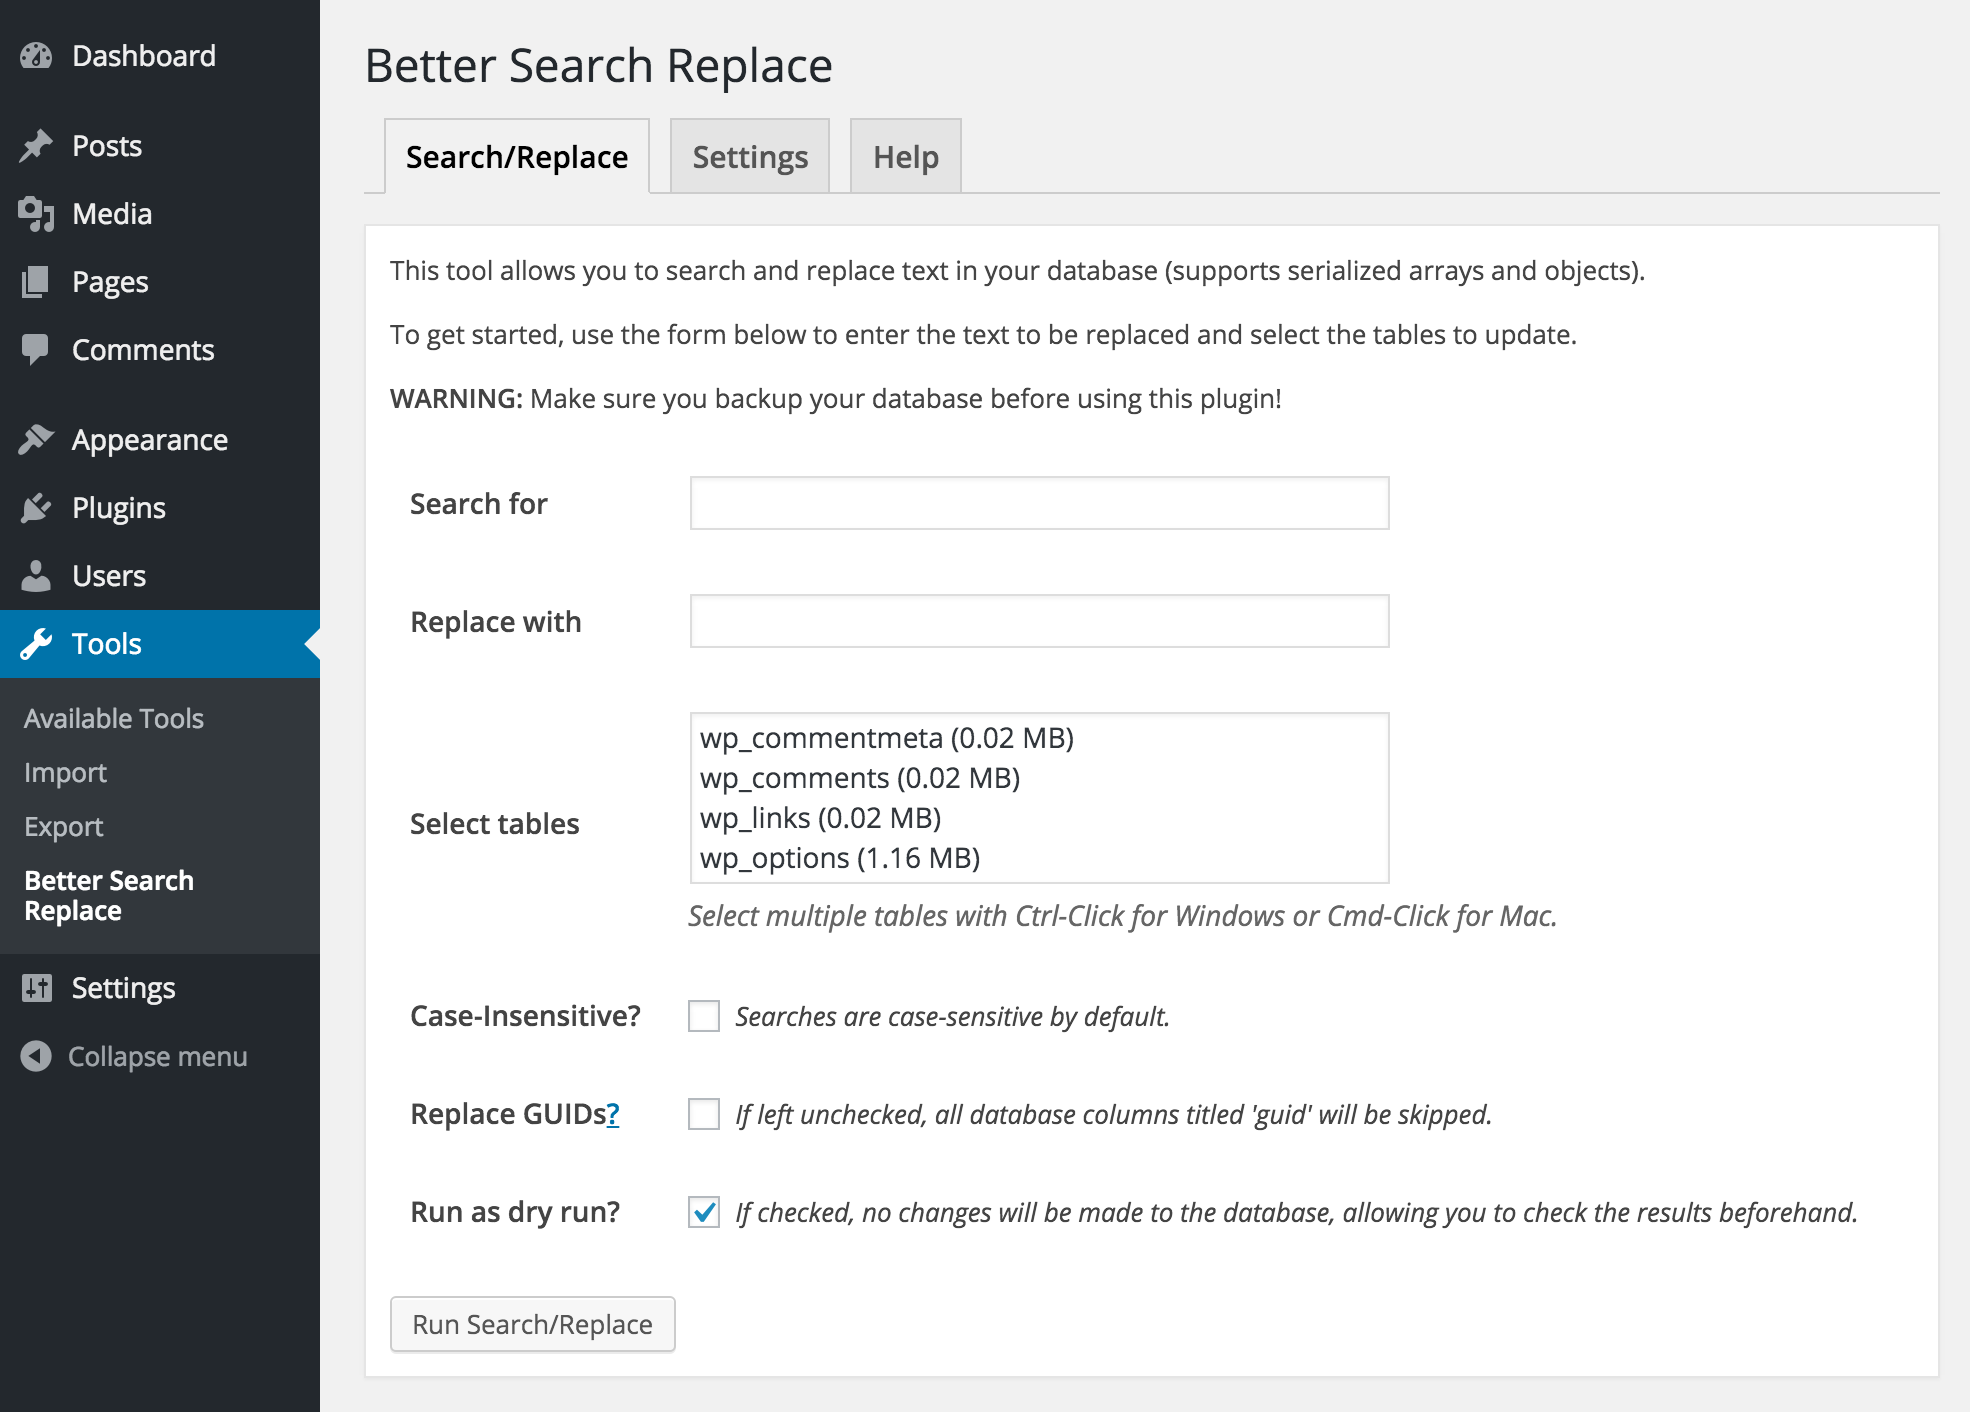
In order to avoid mixed content errors, you can simply edit all URLs in your database that still show under HTTP.
You can use a plugin that searches and replaces URLs, such as Better Search Replace plugin.
Open the plugin and just search for http://yourwebsite.com and replace with https://yourwebsite.com. Click on Run Search/Replace.
Step 8 – Send your HTTPS WordPress website to Google Search Console
Add and verify the new HTTPS site in Google Search Console.
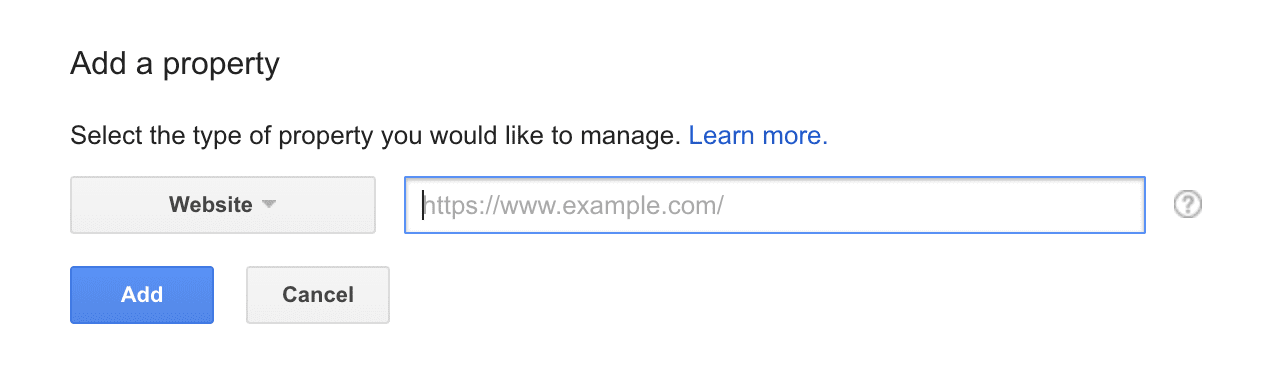
After this, Google will re-crawl your site and submit a new XML sitemap with your HTTPS URLs.
For many SEO elements like “rel=canonical” and Open Graph tags, it is advisable to use an absolute URL, as these are read externally by social media sites and search engine crawlers.
It’s important to note that there will be a period of normalization after applying SSL, but in the end, it is a confirmed ranking signal according to Google.
Similarly, social sharing counters for older content will likely become invalid. This is because now there is a new URL starting with HTTPS rather than HTTP and many tools count each as a separate URL with its own engagement metrics.
Conclusion
SSL protects the information in transit, allowing a website to be accessed over HTTPS. The data is sent encrypted between visitors and web servers. Having an HTTPS WordPress website does not mean the website is protected against website attacks and hacks. It is only a piece of the website security puzzle.
If you want to take a better look at the state of your WordPress website security, you can install the free Sucuri security plugin.
In case you want to have peace of mind, find out how our website security platform can detect, protect, and clean website malware. You can also activate SSL/HTTPS via our cloud-based WAF that is included in the platform.