If you own a WordPress website and ever encountered the “Not Secure” warning, you might have worried that visitors would perceive your site as spam or fraudulent. Not only does this warning impact user trust, but it can also create technical search issues when both HTTP and HTTPS versions of your pages remain accessible or when redirects, canonicals, and sitemaps point to different URL versions. Browsers show the visible security warning, while search engines rely on permanent redirects, canonical URLs, and updated sitemaps to understand your preferred HTTPS pages.
Understanding the ‘Connection Not Secure‘ warning
When users visit your website, data is transferred between their browsers and your servers. If sent via HTTP (HyperText Transfer Protocol), this data is vulnerable to interception since it is sent in plain text. When plain text information is intercepted by bad actors, it can be misused — leading to security breaches and loss of sensitive data for both you and your website visitors.
To fix this, you need to implement HTTPS, which encrypts data with an SSL certificate. If a hacker intercepts any information as it passes to and from your site, it will appear as incomprehensible gibberish, protecting sensitive information like login credentials, form submissions, and credit card information.
Implementing SSL also comes with some SEO benefits as well, since Google and other search engines flag sites without HTTPS and SSL as insecure. In essence a missing SSL certificate can ultimately lead to unwanted “Connection not secure” browser warnings.
Why WordPress shows ‘Not Secure’ warnings
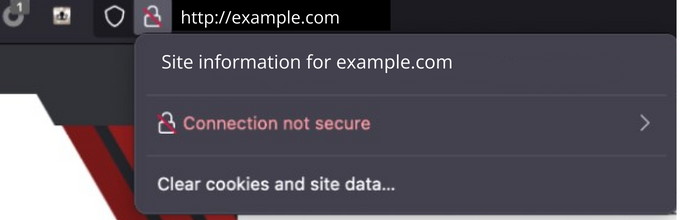
The primary reason your WordPress website might be displaying a “Not Secure” warning is due to the lack of a valid SSL (Secure Sockets Layer) certificate.
A certificate can also be present and still fail if it is expired, revoked, self-signed on a public site, installed for the wrong hostname, or served with an incomplete certificate chain. Common examples include a certificate that covers example.com but not www.example.com, or an origin server behind a CDN that is not configured for end-to-end HTTPS. Another possibility could be that your website needs updating. WordPress updates often include security patches, so ensuring your site is up-to-date could help resolve this issue.
In some cases, a faulty plugin could be causing your site to appear insecure. If you’ve recently added or updated a plugin and the “Not Secure” warning has appeared, this could be the source of the problem. You can test this by removing the suspected plugin and checking if the warning goes away. That said, routine updates rarely solve a certificate warning by themselves unless the real issue is mixed content, a bad redirect, or a theme/plugin conflict that is still outputting HTTP URLs.
Most commonly, the issue is directly related to the SSL certificate. If your WordPress site is displaying a “Not Secure” warning, it’s important to verify that you have an active, suitable SSL certificate. This will help safeguard your website, data, and visitors from potential security breaches – however, it won’t prevent your site from being hacked in the first place.
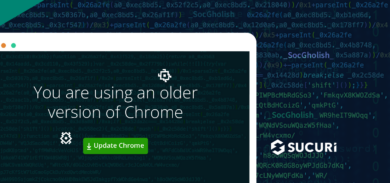
If SSL is present but is not configured properly or the webpage has mixed content, then you might also encounter a warning like this one:
 What is a mixed content warning?
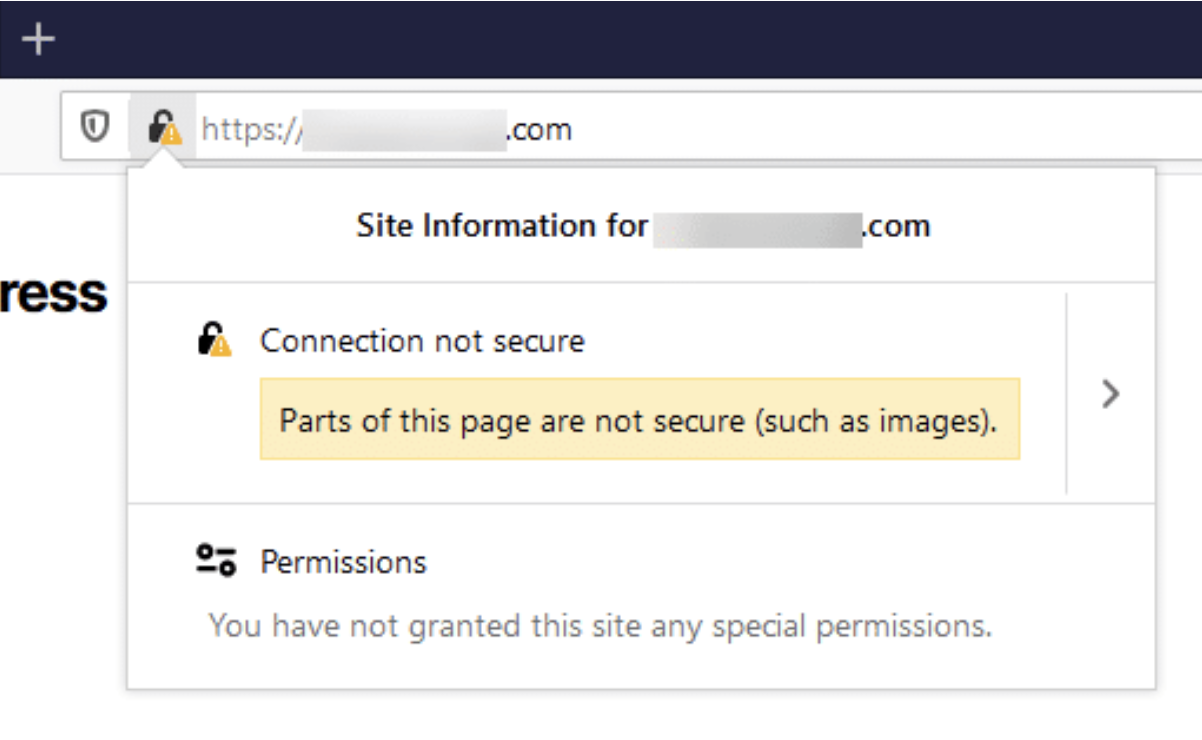
Mixed content warnings occur when a web page that is supposed to be served over a secure HTTPS connection (encrypted) also includes resources (such as images, scripts, stylesheets, or other media) that are loaded over an insecure HTTP connection — and is therefore unencrypted.
It may not sound like a huge deal, but depending on the situation some types of mixed content could present a serious security vulnerability that potentially allows attackers to replace website content or even eavesdrop on users. Furthermore, browsers will warn your site visitors and block access to any mixed content on your site, which can affect their ability to properly browse your domain and result in a negative user experience.
If you’re worried about mixed content, you can easily check if your website has any with this easy-to-use-website: https://www.whynopadlock.com/ Chrome users can also leverage DevTools to detect mixed content issues in their browser.
How to remove ‘Not Secure’ warnings from WordPress
Follow these steps to find and remove “Not Secure” warnings for your WordPress website.
- Back up your website
- Check your site for SSL certificates
- Install an SSL certificate
- Renew expired certificates
- Redirect URLs from HTTP to HTTPS
- Scan your site for mixed content
- Find and replace any non-HTTPs URLs
- Confirm that issues are resolved
1. Back up your website
The first step you should take prior to investigating or making any changes to your site is to perform a full backup of your website files and database. This way, you’ll be able to easily revert back to your previous set up in the event of any issues.
If you’re a confident (or aspiring) WP-CLI user, you can check out these step-by-step instructions on how to backup WordPress for free using the command line.
Once you’ve got your backup ready and tested to make sure it works, let’s move on to our investigation!
2. Check your site for SSL certificates
Next, you’ll want to check the status of your website’s SSL certificates.
You can easily check for your website’s SSL details (like SSL status, SSL provider, and SSL expiry date) on SSL shopper. https://www.sslshopper.com/ssl-checker.html
Results will be displayed like this:
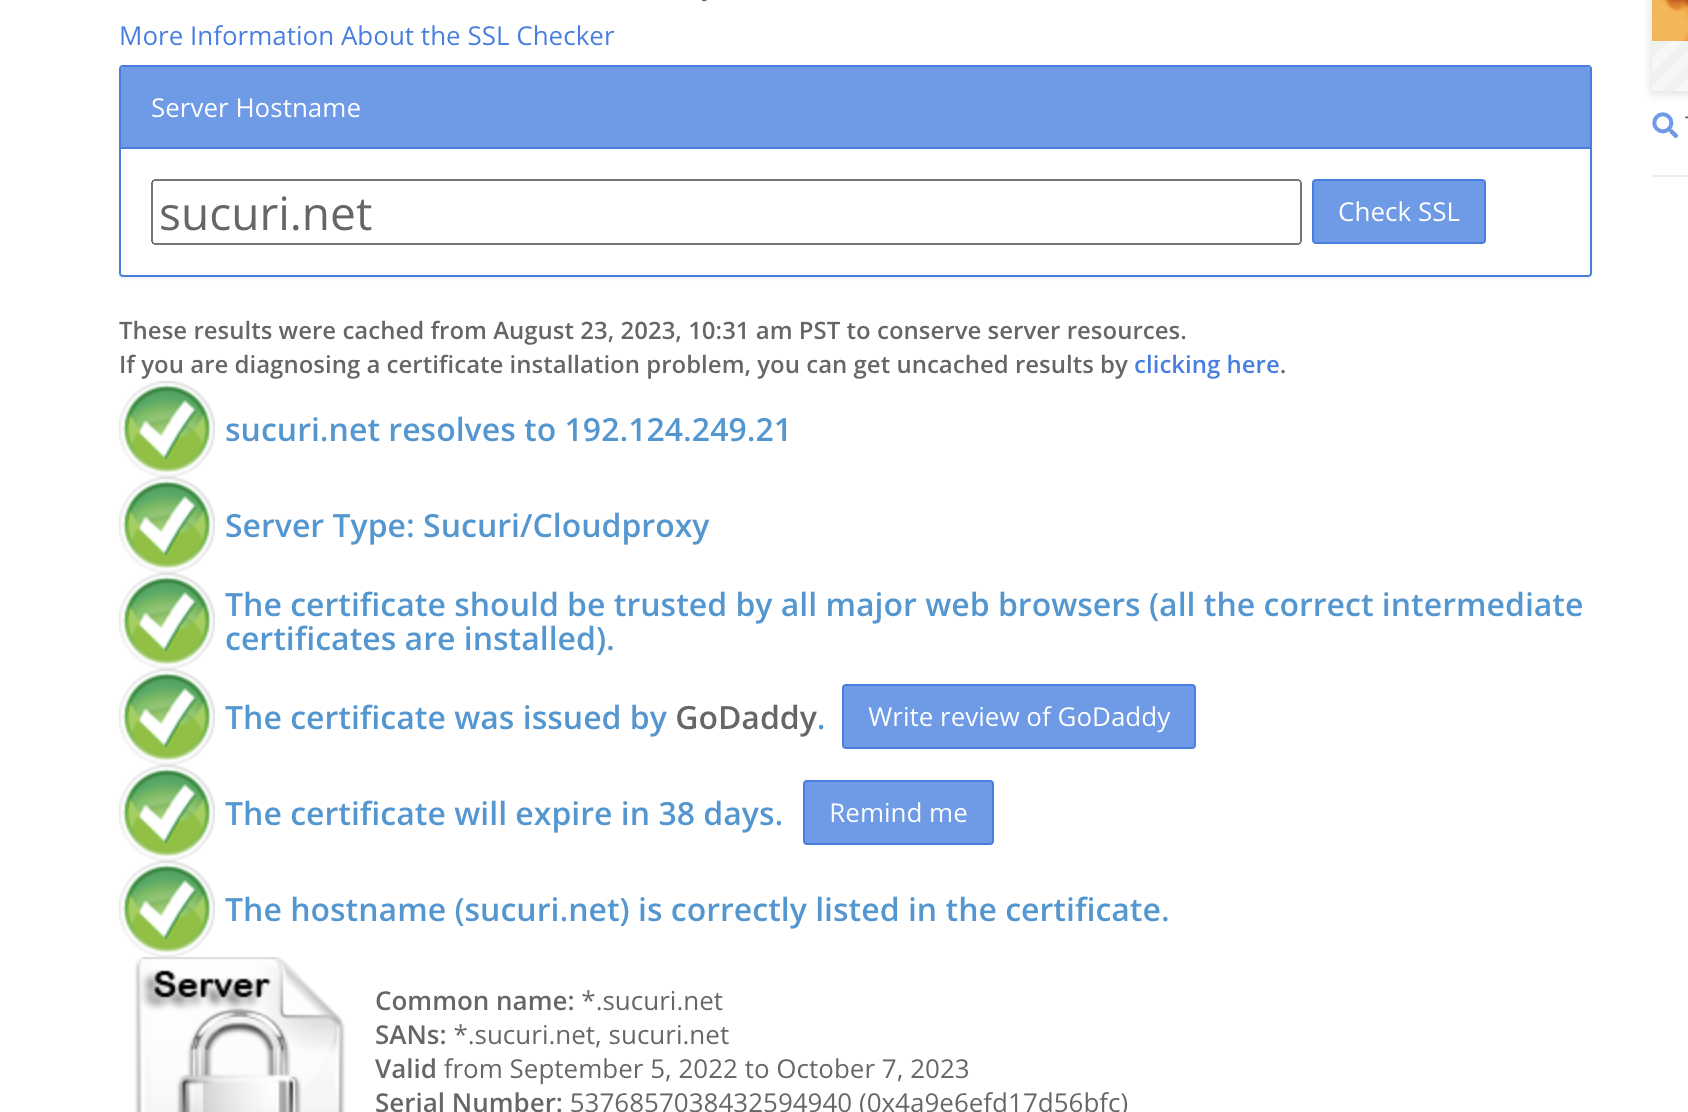
From here, you’ll be able to see if your website is missing a certificate or there’s issues with an existing one.
3. Install an SSL certificate
If SSL is not yet active on your site, you will need to go through the steps to install an SSL certificate.
A fresh SSL registration can be done from any external SSL provider or your domain or hosting provider. Creating a free certificate from Let’s Encrypt is sufficient for most WordPress sites, and many hosts can provision and renew it automatically. Make sure the certificate covers every hostname you actually use, especially both the apex domain and www if both exist. If HTTPS terminates at a CDN, reverse proxy, or load balancer, verify whether the origin server also needs its own valid certificate.
Sucuri clients can contact our team and create a support ticket for assistance with certificate setup. If you’ve already got an SSL but it’s expired, skip along to the next step.
4. Renew expired SSL certificates
Where possible, enable automatic renewal and verify it works before the certificate is close to expiring. Some managed platforms and CDNs will renew certificates automatically.
If an SSL was installed on your site but has since expired, you will need to renew it through the SSL or hosting provider you requested it through, or request a new one. This can be done through an external 3rd party SSL provider or hosting providers. Sucuri clients can contact our team and create a support ticket for assistance with certificate setup.
5. Redirect URLs from HTTP to HTTPS
Once SSL has been successfully installed on your site, you’ll need to make sure that it’s activated on both www and non-www versions of your website (e.g., https://example.com and https://www.example.com).
To accomplish this, we’ll need to redirect all website requests through HTTPS instead of HTTP. There are a couple of different ways you can set up these redirects for your site.
Force HTTP to HTTPS redirects via WordPress plugin:
For WordPress users looking for a simple solution, the Really Simple SSL plugin makes HTTPS redirects quick and easy.
Simply install the plugin on your site then navigate to the plugin from your dashboard.
If you have an active certificate already, you’ll see the following dialog in the plugin instead.
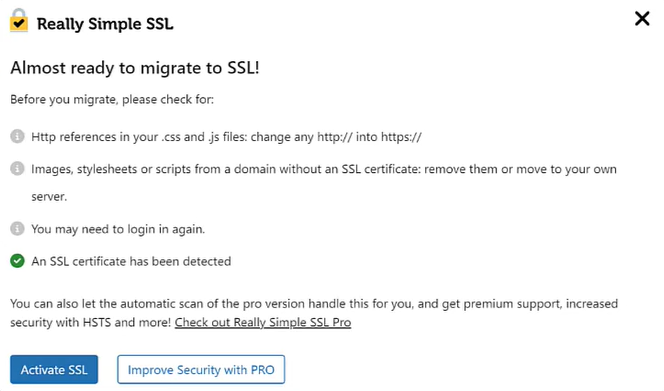
Click Activate SSL to proceed. That’s it! Your site will now automatically redirect to HTTPs.
Force HTTP to HTTPS redirects via .htaccess file:
For intermediate users who like to modify their configuration files, you can define website redirects in your .htaccess file.
To force redirects from HTTP to HTTPS, you’ll need to insert the following code in your .htaccess file:
<IfModule mod_rewrite.c>
   RewriteEngine On
   RewriteCond %{HTTPS} off
   RewriteRule ^(.*)$ https://%{HTTP_HOST}%{REQUEST_URI}      [L,R=301]
</IfModule>
6. Scan your site for mixed content with WhyNoPadlock
To check for mixed content on your website, you’ll want to use a tool like www.whynopadlock.com. Enter the full HTTPS URL of each page you want to test, starting with the areas that matter most, like your homepage, login, cart, checkout, account pages, contact forms, and any posts or landing pages that contain third-party embeds. Then make a list of all affected pages and jot them down for reference to complete the next step.
7. Find and replace any non-HTTPS URLs
If everything is still working great on your site, now might be a great time to perform another backup – just in case.
Next, you’ll need to find and replace any HTTP URLs with HTTPS. To begin, make sure your SiteURL and WordPress URL are both using HTTPS. You can check this from your WordPress dashboard > Settings > General page.

Note: If you can’t reach wp-admin after switching to HTTPS, you can temporarily define WP_HOME and WP_SITEURL in wp-config.php to restore access, then remove those hard-coded values after correcting the settings in the dashboard.
Next, you’ll want to take your list from step 6 to update and replace any HTTP links with HTTPS. A great WordPress plugin you can use for this task is Better Search Replace.
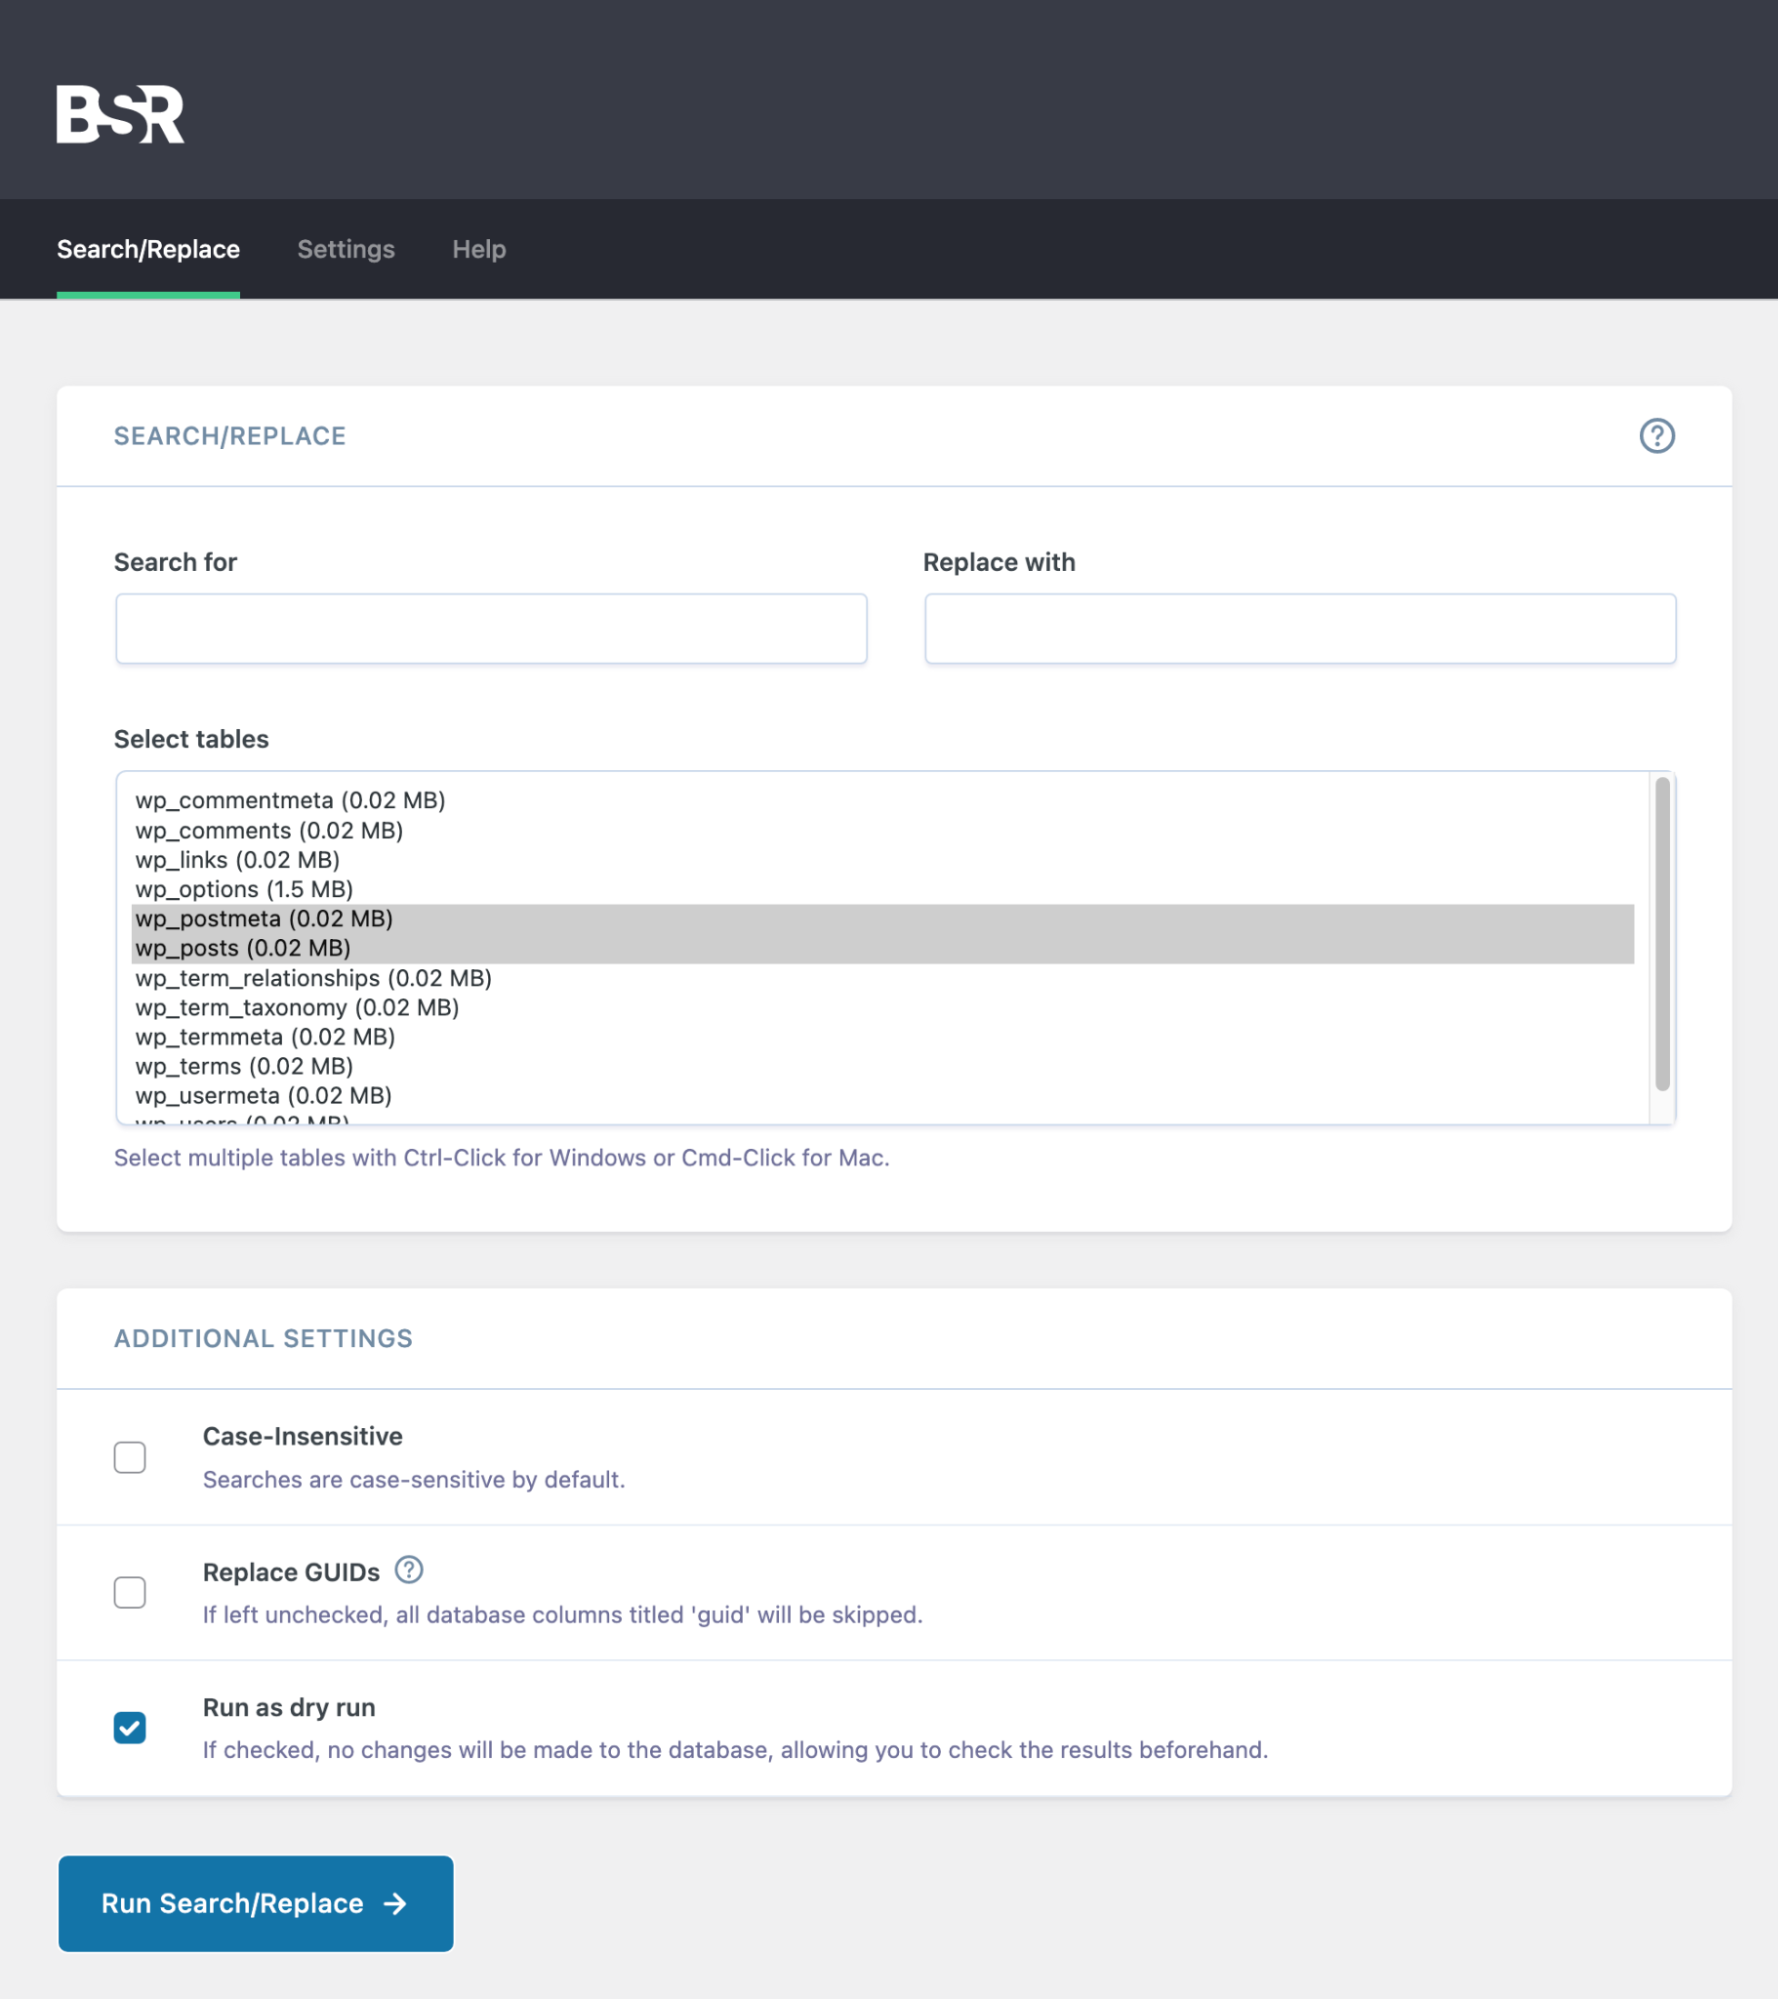
The best part about this plugin is it allows you to perform a “dry run” to test and verify how many fields will be updated before actually making any changes. Furthermore, it offers multi-site support in the event you have multiple domains with issues.
When you’re satisfied with the dry run results, apply the changes directly to your website.
8. Confirm that the issues are gone
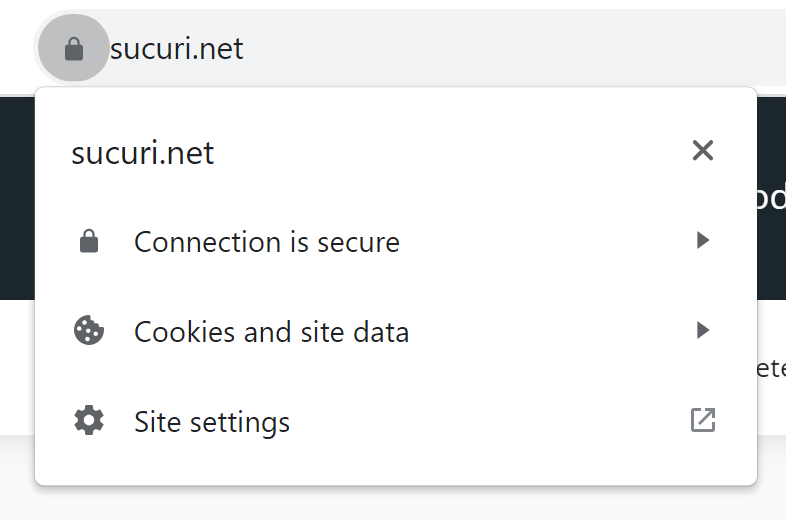
Once you’re finished with the searching and replacing of HTTP URLs, you’ll want to navigate back to your website to confirm that the issues are gone.
Confirm that each page loads over HTTPS without certificate or mixed-content errors. Depending on the browser, the address bar may show a padlock, a site-controls icon, or another neutral indicator rather than a green lock, so focus on the connection details instead of a specific icon color or shape.
Why is SSL needed for a WordPress website?
SSL protects sensitive information like passwords and payment details, builds trust with visitors, improves SEO rankings, and helps prevent data breaches and cyberattacks, ultimately enhancing website security.
- Secure transmission of data: SSL encrypts all the interactions between your web-browser and web-server. This helps to hide critical information like login credentials, payment details, and credit card information from bad actors.
- Reputation management and user trust: When visitors see a green padlock and a secure connection in front of your website URL, they feel confident to browse through your site without worrying about any attacks.
- Improved search rankings: Mixed content and missing SSL certificates can result in decreased rankings, as search authorities prioritize websites that provide safe user experiences.
- Access to modern browser features: Many web platform features are available only in secure contexts, so HTTPS can also be a functional requirement for some authentication, device, and browser APIs.
FAQ
What is the difference between SSL and TLS?
“SSL” is a commonly used term, but modern websites use TLS (Transport Layer Security). TLS is the updated, more secure version of SSL. Most hosting providers and tools still use “SSL” terminology for simplicity, even though TLS is what actually secures your site.
How long does it take for HTTPS changes to fully take effect?
Changes to HTTPS typically take effect immediately for users once redirects are properly configured. However, search engines may take several days to weeks to fully process and reflect the changes in search results, depending on crawl frequency and site size.
Can I use a free SSL certificate for my WordPress site?
Yes, free SSL certificates from providers like Let’s Encrypt are sufficient for most websites. They provide the same level of encryption as paid certificates. The main difference is in validation type, support, and warranty—not encryption strength.
Does HTTPS improve SEO for WordPress websites?
HTTPS is a lightweight ranking factor, but more importantly, it ensures consistent URL signals and prevents duplicate versions of pages (HTTP vs HTTPS). Proper redirects, canonical URLs, and updated sitemaps contribute more significantly to search performance.
What happens if I don’t fix the “Not Secure” warning?
Visitors may lose trust and leave your site, forms and checkout pages may appear unsafe, and some browser features may be restricted. Over time, this can negatively impact conversions, user engagement, and technical search performance.
How can I confirm my WordPress site is fully secure?
Check that all pages load over HTTPS without warnings, verify your SSL certificate is valid and not expired, confirm redirects are working properly, and scan for mixed content. You can also use tools like SSL Labs, browser DevTools, and Google Search Console to validate your setup.
Beyond SSL: Additional steps to secure WordPress
While SSL is extremely valuable for encrypting data in transit to and from your website, it cannot prevent a hack. Here are some additional steps that can help you secure your WordPress website from attacks like DDoS, malwares, bad bots, SEO spam and hackers.
- Regularly update your website software, plugins, and themes: Keep your CMS, plugins, themes and other website software current. Updates are often released to fix security loopholes. Leverage a WordPress security plugin for additional protection.
- Set up a website firewall: A good website firewall will filter traffic, preventing malicious data from reaching your server. It can also help mitigate DDoS attacks, patch known vulnerabilities, and effectively block harmful bots.
- Implement Multi-Factor Authentication (MFA): Require logical tasks (like captcha completion or OTP entry) for user login. This deters bot attacks and brute force — and substantially strengthens your website’s security.
- Regularly monitor and scan your website for malware: Use tools like sitecheck.sucuri.net to remotely scan for website malware and other indicators of compromise. Take advantage of automated server-side scanning services for continual website protection.
- Monitor Google Search Console’s Security Issues report alongside your malware scanner so you can catch hacked content, malware, or deceptive pages that search engines detect.
- Enforce strong password policies: Ensure all of your passwords are strong, complex and frequently updated. An ideal password includes a mix of uppercase and lowercase letters, numbers, and special characters; the longer, the better.
- Keep regular website backups: Regular online and offline backups enable quick website restoration in case of malware infections. This practice minimizes data loss and downtime.
- Avoid nulled or pirated plugins or themes: Refrain from using pirated or ‘nulled’ software, themes, or plugins as they could introduce vulnerabilities or backdoors to your website.