Sure, there are tons of one-click installers floating around for WordPress. But they’re not always the most secure option — and can still be tedious to use, especially if you need to update default configurations after installation. But what if I told you there’s a simple, reliable, and standard way to manage and install WordPress using WP-CLI over SSH?
In today’s post, we’ll cover the basics of connecting to your server and installing WordPress core over SSH (Secure Shell). So, let’s dive into one of the most secure and convenient ways to install WordPress on your web server!
Contents:
- Connect to the server via SSH
- Install WP-CLI
- Create a WordPress directory
- Download and configure WordPress
- Change permissions for wp-config.php
- Configure wp-config.php
- Enable file uploads
- Clear command history
- Video tutorial
- Additional resources
Is SSH really more secure than FTP?
Using terminal to access and install WordPress isn’t just convenient — it has another added bonus: SSH authenticates and encrypts all connections. And since the SSH protocol encrypts the commands and data transfers to and from your server, it does a better job keeping your website’s server connection private than regular FTP (File Transfer Protocol) clients.
FTP has been around since before the evolution of public networks and wasn’t designed with security in mind. While FTP clients may be convenient, there are some disadvantages to using them — including the fact that files, usernames, and passwords are sent in plain text. Any data that’s transferred using an unencrypted protocol is subject to possible eavesdropping, which could put your system or data at risk.
SSH, on the other hand, was born after a sniffing attack was performed on the HelSinki University of Technology and users realized they needed a more secure method of transferring data. This client-server based protocol works by using authentication methods and encrypting remote connections for users and processes.
Furthermore, FTP is only able to perform basic file operations and transfer files from one destination to another. But SSH provides secure access to the server shell, allowing you to perform and execute a full range of server commands. It also supports extra functionalities such as monitoring running services or applications and transferring or modifying files.
If these SSH instructions are a little intimidating, consider using SFTP (Secure File Transfer Protocol) over regular FTP.

SFTP is a file transfer protocol that uses SSH encryption to securely transfer files between systems. It comes as a standard part of SSH version 2.0 and most FTP clients support it.
How to install WordPress using WP-CLI
Before we get started, make sure you have the following:
- SSH access and key pairs
- Server details (IP address, username, and port)
- PHP 8.2 or higher
You’ll also want to ensure you have defined the necessary information for your wp-config.php file, too.
Next, let’s review the steps to install WordPress using WP-CLI.
1 – Connect to your website’s root over SSH
First, connect to your website’s docroot over SSH. You can use terminal for Mac, Linux, or Windows Terminal.
- Open your terminal.
- Type the following, replacing the username and server info (ssh.host.server.com) with your own:
ssh username@ssh.host.server.com
- Press Enter and type your password to authenticate.
Note: If you’re using a custom port, add -p XXXX to the comment (replacing XXXX with your port number).
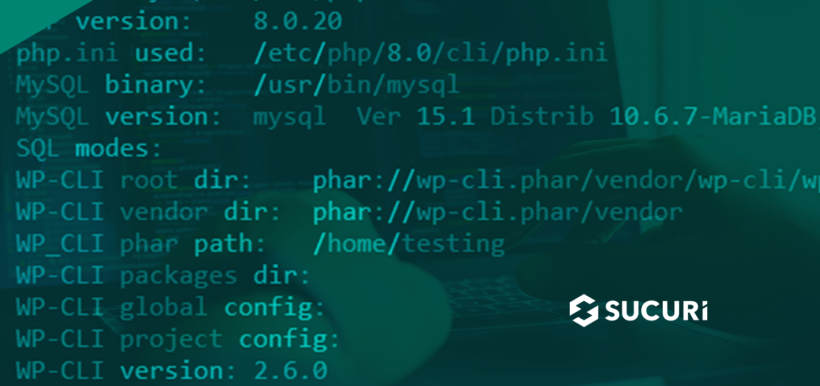
2 – Install WP-CLI
Once you’ve connected to your server, you’ll want to check if WP-CLI has already been pre-installed by your host. Type the following command into terminal:
wp cli version
If WP-CLI is present, you should get an output that looks something like this:
$ wp cli version
WP-CLI 2.12.0
If WP-CLI has not yet been installed by your host, copy and paste the following command into the prompt and press Enter to install the latest version of WP-CLI.
curl -O https://raw.githubusercontent.com/wp-cli/builds/gh-pages/phar/wp-cli.phar
And if that doesn’t work, try:
wget https://raw.githubusercontent.com/wp-cli/builds/gh-pages/phar/wp-cli.phar
Important: After downloading, you must make the file executable and move it to your path to use the wp command globally:
chmod +x wp-cli.phar
sudo mv wp-cli.phar /usr/local/bin/wp
Next, verify that WP-CLI is properly installed by running the wp cli version command again.
3 – Create a new WordPress directory (optional)
If WordPress is going to be your primary CMS, skip this step to install WordPress in the docroot of your website.
But if you intend on using different CMS platforms in addition to WordPress, create a subdirectory and navigate to it with the following commands.
mkdir blog

cd blog
These two commands will create a new directory for you to install WordPress in a subfolder of your website (for example, site.com/blog instead of site.com) and then move you to your new subfolder.
4 – Download and configure WordPress
Next, let’s download and configure WordPress. Enter the following command to download the most recent WordPress core files:
wp core download
Then, replace the examples below with the info for your WordPress database:
wp core config --dbhost=host.db --dbname=prefix_db --dbuser=username --dbpass=password
In this example, this would configure your new database with the following settings:
- Database Host: host.db
- Database Name: prefix_db
- Database User: username
- Database Password: password
Make sure you modify these default credentials to something unique and secure.
If your user has the correct privileges and the database does not exist yet, you can run
wp db create immediately after this step to create the database automatically.
5 – Change permissions for wp-config.php
Now you’ll need to change the permissions on your wp-config file.
chmod 600 wp-config.php
Use 600 or 400 for a more secure configuration, especially if you’re using a shared environment.
6 – Configure wp-config.php
Next, configure your wp-config.php file to complete the installation. Replace the examples below with the information for your website, including the URL for your new WordPress install, the Title of the site, and your admin user.
wp core install --url=yourwebsite.com --title="Your Blog Title" --admin_name=wordpress_admin --admin_password=4Long&Strong1 --admin_email=you@example.com
In this example, this would configure your new WordPress website with the following settings:
- Installation URL: yourwebsite.com
- Website Title: Your Blog Title
- Admin User: wordpress_admin
- Admin Password: 4Long&Strong1!!!
Another gentle reminder here to use strong, unique credentials for every account on your website.
7 – Enable file uploads
Enter the following SSH commands to enable file uploads for your WordPress website.
cd wp-content
mkdir uploads
chgrp www-data uploads/
chmod 775 uploads/
Note: www-data is the standard web server group on Ubuntu/Debian. If you’re on a different OS or using a shared host, check your specific server group.
8 – Clear command history
Run this command to remove the history of any commands you typed during this session, which contains your super-secret WordPress configuration information!
history -c && exit
Still with me? Good, because you’re done.
Now you can use WP-CLI to install and activate themes and plugins using the slug, ZIP, or URL from the Download button on the repository.
Well done! If you want more, you can even manage WordPress multisite installs using WP-CLI. I encourage you to check out the WP-CLI documentation to learn more about the wonderful world of WordPress’ command-line interface.
WP-CLI FAQ
Q: Is installing WordPress via WP-CLI secure?
Yes. When accessed over SSH, all commands and data are encrypted. Using WP-CLI minimizes the risk of human error during configuration and allows you to set secure file permissions.
Q: What if I’m getting a “Permission Denied” error?
This usually happens if your user doesn’t have the correct file ownership. Ensure you are in the correct directory (your document root) and that your user owns the folder. If you’re on shared hosting, you may need to contact support to resolve your permission issues.
Q: Can I use WP-CLI to update WordPress later?
Absolutely. In fact, it is safer and faster. You can run wp core update to update WordPress, wp plugin update --all for plugins, and wp theme update --all for themes.
Q: Do I need to be a root user to run these commands?
No, and your generally shouldn’t be. It is best practice to run WP-CLI commands as the specific system user that owns the website files (e.g., www-data or your specific cPanel username) to avoid creating permission conflicts.
Q: How do I update WP-CLI itself?
WP-CLI has a self-update mechanism. Simply run wp cli update to get the latest stable release.
Additional resources
Check out these additional resources for common WP-CLI commands and instructions.
- WP-CLI Commands
- How to connect to WordPress via SSH
- How to backup WordPress via WP-CLI
- How to manage Plugins and Themes with WP-CLI