We’ve all received spam and phishing emails — our inboxes are often full of them. They let us know that our package is being delivered (even when we haven’t ordered anything), provide details on our “recent” tax filing (that was completed months ago), and encourage us to act fast and enter our credit card — or risk missing out on limited time special offers and cash prizes..
Unfortunately, victims who unknowingly provide their personal details to fraudsters through phishing emails often face severe repercussions, such as identity theft and fraud. According to phishing statistics from AAG, an estimated 3.4 billion spam emails are sent every day. Furthermore, over 48% of all emails sent in 2022 were spam.
Yet even more alarmingly, ProofPoint’s latest 2023 State of the Phish report revealed some shocking data points users on the receiving end of phishing emails: 44% of users think an email is safe when it contains familiar branding, while another 63% of users don’t know that an email link text might not match the website it goes to.
In light of these data points, I thought I’d tell the story of some spam that was delivered into my own inbox and share some steps you can take to recognize (and avoid) phishing emails.
What is phishing, anyways?
Before we get started, it might make sense to quickly define what phishing is in the first place.
Phishing is the deceptive practice used to acquire sensitive personal identification information by pretending to be a trustworthy entity. Fraudsters often portray themselves as well-known brands, banks, internet service providers, retail companies, or other services to gain the victim’s trust.
The ultimate goal of a phishing attack is to steal sensitive data from an individual — for example, usernames, passwords, credit card details, Social Security Numbers (SSN), bank account details, email addresses, phone numbers, or even answers to secret questions.
How to spot and identify a phishing email
Knowing how to identify malicious phishing emails is the first step in preventing one of those emails from infecting your device or redirecting you to a landing page designed to steal your data.
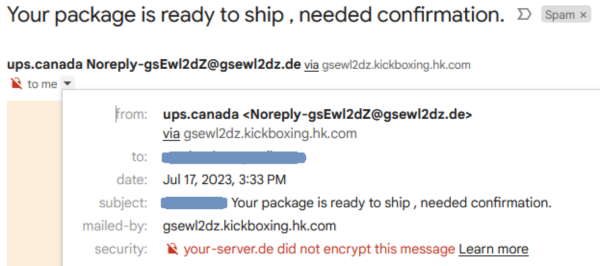
Let’s take a look at one such example delivered directly to my email address.
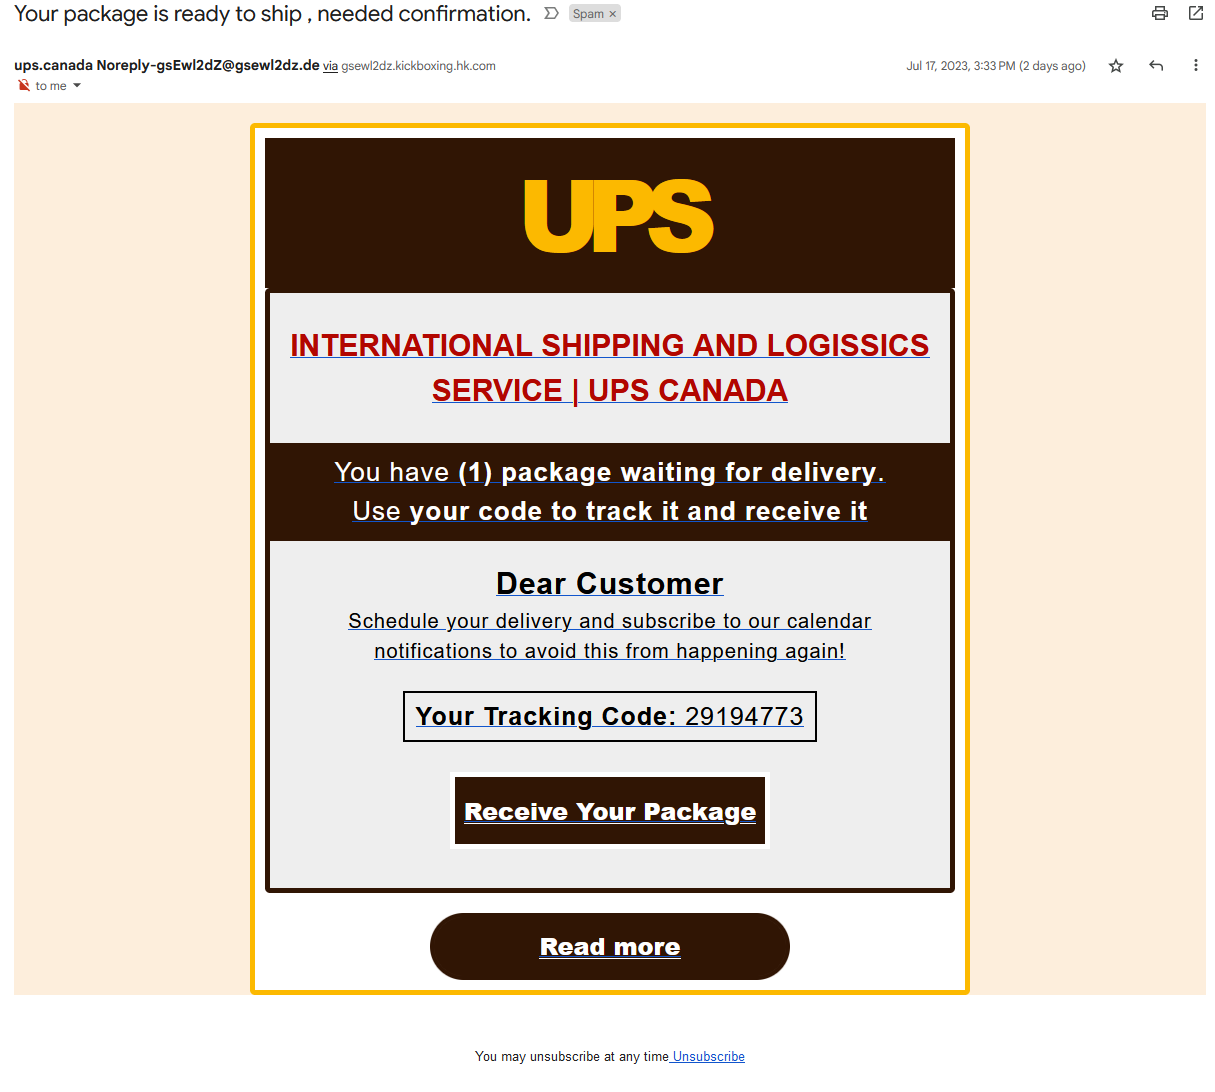
At first glance, this might seem like a valid email. It leverages a recognizable logo and even applies brand colors to the email template.
However, there are a couple of red flags that help us identify that the email is in fact a bit phishy. Let’s take a look at some telltale signs.
Signs of a phishing email:
Phishing emails often contain at least one of the following red flags.
- Typos in the email content and subject lines
- Email address uses a different domain or doesn’t match the sender name
- Links don’t match the domain name of the sender
- Email invites you to click on links to update information
- You find attachments in the email
1 – Typos in the email content and subject lines
Sure, it’s always possible that Marketing is just having a bad hair day when you receive a branded email with a bunch of typos. But more often than not, spelling mishaps and bad grammar are a pretty good tell that the email is not from a reputable sender.
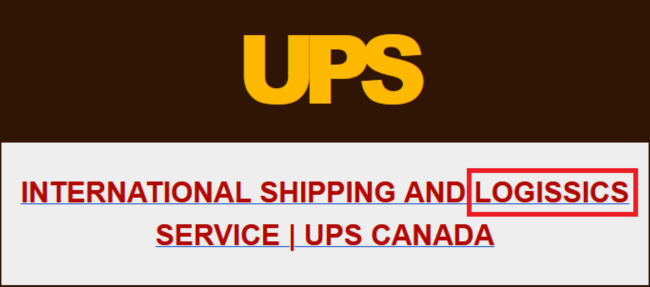
In this case, multiple typos, spacing issues, and strange grammar were immediately visible in the subject lines and email body. So, always take a minute to thoroughly read through an email before you begin engaging with it.
2 – Email address uses a different domain or doesn’t match the sender name
Legitimate organizations definitely won’t be sending emails from unverified domains, as seen in the example below.
You can check your email headers to verify the details. The specific steps to check full email headers will depend entirely on your email application. You can find comprehensive instructions to check headers for the most common email applications at mxtoolbox. But, we’ve provided steps for the popular Gmail client below.
To check email headers in Gmail:
- Open the specific email whose headers you wish to inspect.
- Locate the Reply button at the upper right corner of the email window and select the More menu.
- From the drop-down, select the option ‘Show original‘.
- A new window will appear displaying the full headers for you to review.
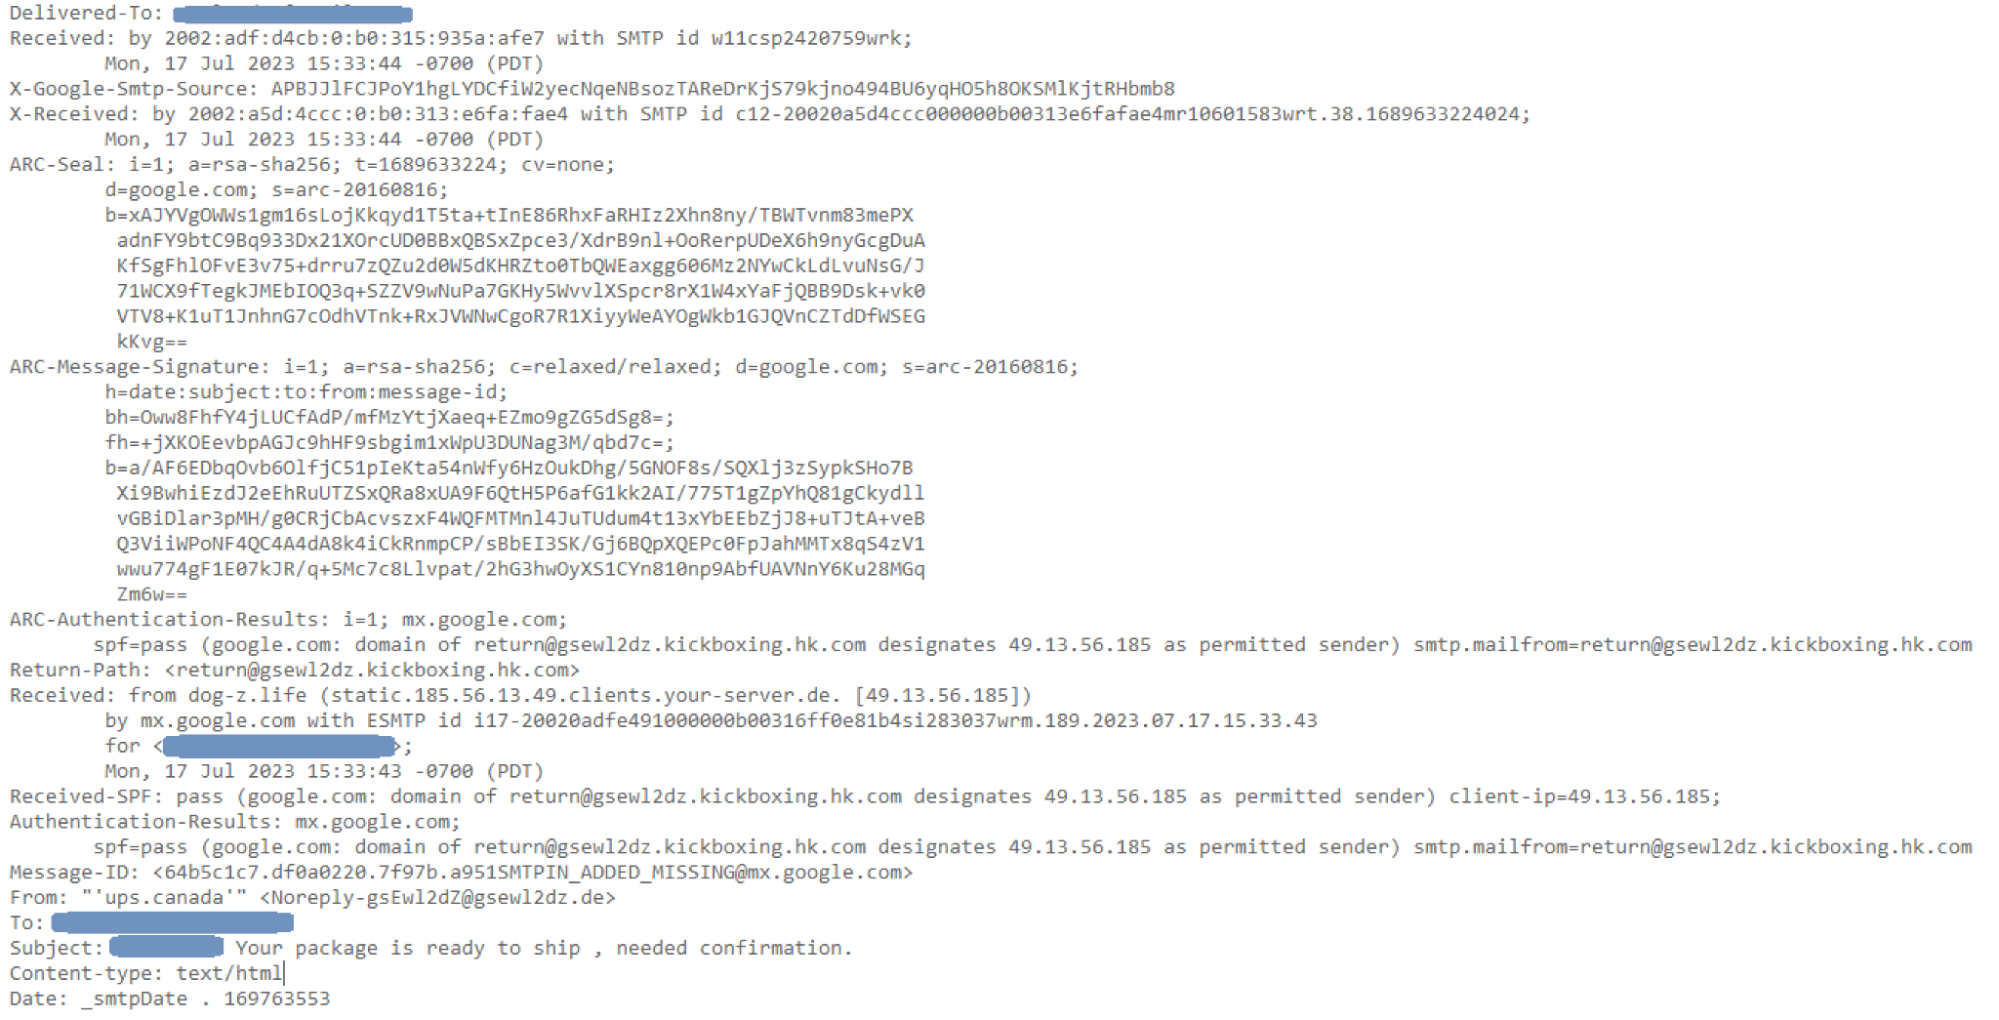 As seen in both screenshots above, the sender’s email address clearly does not belong to UPS.
3 – Links don’t match the domain name of the sender
Sketchy looking email? Hover before you click!
You can quickly check the URL destination by hovering over a button in your email client. In this case, the link destination definitely wasn’t for the UPS website.
![]()
For example, this link in our suspicious email uses a base64 encoded destination. When decoded we see the following.![]()
Modifying any of those digits will redirect us to any number of random websites.
4 – Email invites you to click on links to update information
Look before you leap! Legitimate companies won’t email or text you links encouraging you to take prompt actions to update your payment information (or accept a package).

According to this phishing email example, however, the user must enter a code to receive a package that is “waiting for delivery”. Definitely a bit suspicious; this may be an attempt to make the email seem valid, or the scammers may be hoping that we would enter a valid tracking ID so that they could take control of that delivery.
5 – You find attachments in the email
A reputable business will never require you to download a file directly from an email. They will typically redirect you to their official website, where you can securely download any required documents. Refrain from opening email attachments, even if they appear to originate from a “trusted” organization.
Recognizing the signs of a phishing email greatly reduces the risk of falling prey to malicious cyber attacks. Pay attention to details such as typos in content and subject lines, mismatched email addresses and domain names, and suspicious links. And be extra wary of emails that pressure you to update your information, click on links, or take quick action.
It is becoming increasingly common for spam and phishing emails like the example above to be submitted to websites via contact forms on the site. When those messages are submitted, they are often delivered to a mailbox configured to receive form submissions. If such an email is delivered from your site, then the headers may not display the original sender’s details but may instead display your mail server information.
What should I do if my website starts sending phishing or spam emails?
Hacked websites are commonly used to send out mass phishing and spam campaigns. If you have reason to believe that your website is the source of spam or phishing emails, immediate action should be taken to investigate and stop any potential damage.
Steps to check for and prevent phishing on your site:
- Begin by conducting a thorough malware scan. You can opt to do this yourself, or leverage a reputable security company to scan your website for malware. The scan should be deep and comprehensive, covering all aspects of your website: files, databases, posts, and the web server itself. For example, we often find PHP mailer scripts and other malicious code lurking on the server level that are used for spamming, so don’t skip this step. You can also check your mail server logs to identify any anomalies in outbound emails, which may imply they’re being used for spamming.
- If the scan uncovers any suspicious files or scripts, remove these instantly. Be sure to make a backup of your website before making any changes. Files can either be replaced with fresh copies, or you can revert to a recent uninfected website backup. Check out our how to clean a hacked website guide for step-by-step instructions.
- After identifying and removing the threats, promptly change all account passwords. This includes CMS, FTPs, databases, and SSH. Make sure you have unique and strong passwords for each of your accounts. Don’t overlook dormant or rarely used accounts, as hackers often exploit these to gain unauthorized access.
- Update all the components of your website. That includes themes, plugins, CMS, and every other software to their latest versions.
- Install a spam filter. For spam submitted through Website contact forms, installing a spam filter in the website itself can block the majority of that content from ever reaching the site. Many plugins like Akismet for WordPress are free but also offer a more comprehensive paid subscription. Contact forms should be limited in your web site and a captcha should be enabled to help mitigate spammers and bad bots.
- Get your site behind a web application firewall. A website firewall can help harden your site against attack, thwart bad bots and brute force attacks, and virtually patch known vulnerabilities to prevent infection.
- Check for blocklisting. Your site may be blocked by Google and other blocklisting authorities due to phishing or other malicious activities; you’ll want to conduct an online status check and request removal after your site is completely clean.
And as always – if you believe your website has been compromised and you need a hand, we’re always happy to help clean up malware!