Given that WordPress powers millions of websites worldwide, it’s no surprise that it’s a prime target for malicious activities ranging from brute force attacks and hacking attempts to unauthorized access — all of which can wreak havoc on your site’s functionality, damage reputation, or even result in lost revenue and sales.
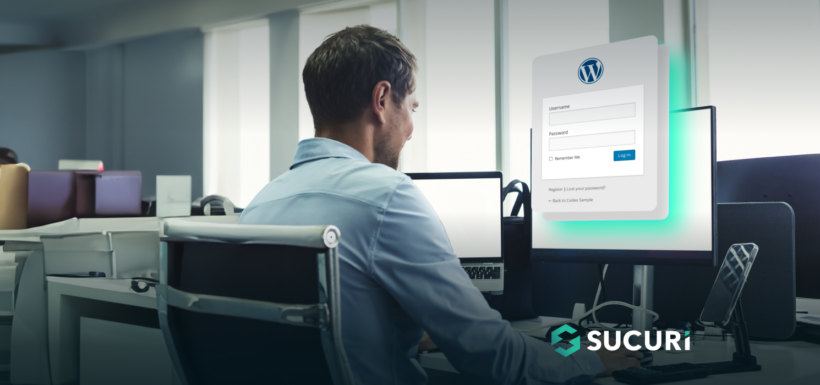
A common entry point often exploited by hackers is the WordPress login page, making its security crucial for the overall protection of your site. In this post, we’ll delve into the importance of protecting your WordPress login page, and more importantly, how to do it. So, let’s dive in.
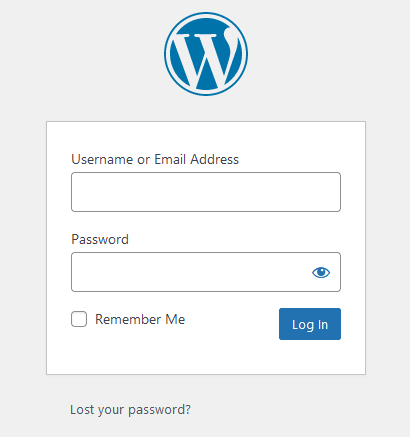
Where is the WordPress login page located?
By default, all WordPress websites have the same login page location — typically your domain followed by /wp-admin/ or /wp-login.php.
What makes the WordPress login page vulnerable to attack?
One of the main reasons that WordPress login pages are vulnerable to attack lies in their predictability. Since the default location for the login page is /wp-admin/ or /wp-login.php, this commonality makes it easy for hackers to find and target these pages.
Once attackers access the login page, bad actors often use a technique known as brute force attacks. This method involves attempting to login repeatedly with different combinations of usernames and passwords until they find the correct combination. The more attempts they make, the higher the chances of them cracking your credentials.
Moreover, if your username is easy to guess — like ‘admin‘ or your first name, which might be publicly available — or the attacker performs a user enumeration attack, then half of the job is already done. Now they only need to guess the password.
Default configurations of WordPress also do not limit the number of login attempts a user can make. This is risky as it allows hackers to make endless attempts to guess your login credentials without any consequences, making your login page an attractive target.
Additionally, many website owners install numerous plugins and themes to customize their WordPress sites. While these tools can be useful, they can also introduce vulnerabilities if they are not regularly updated, happen to be nulled or pirated, or come from untrusted sources.
How to secure the WordPress login page
Let’s take a look at ten steps you can take to secure your WordPress login page and protect your sensitive admin panel from hackers:
- Use strong and unique passwords for all of your accounts
- Change your default WordPress login URL
- Limit login attempts to prevent brute force
- Enable two-factor authentication for WordPress
- Add captcha to your WordPress login page
- Harden your WP-Config file
- Set a nickname to hide your WordPress username
- Clean up and remove old user accounts
- Delete and remove unused plugins and themes
- Update WordPress core, plugins, themes and other components
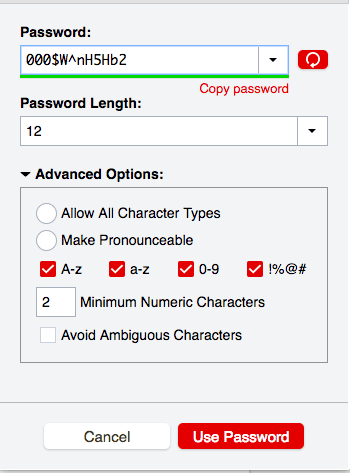
1. Use strong and unique passwords for all of your accounts
Strong and unique passwords are among the most crucial elements to your website’s security. At the most basic level, your WordPress credentials are the first line of defense against potential threats.
What makes a password strong?
A strong password is typically characterized by length, complexity, and unpredictability. Here are a few guidelines to consider:
Length
When it comes to creating a secure password, size matters. The length of your password directly impacts its strength. Your passwords should be at least 12 characters long, but the longer, the better.
Every additional character exponentially increases the time it would take for a hacker to crack your password using brute force methods. This is because they have to try more combinations to guess your password correctly.
In essence, a long password acts as a powerful deterrent, making the hacker’s job significantly more complicated and time-consuming.
By simply using strong passwords with higher levels of entropy, you significantly reduce the risk of unauthorized access to your WordPress website.
Complexity
It’s not just about letters; it’s about the variety of characters you use. Mixing uppercase and lowercase letters, numbers, and special characters add multiple layers of complexity to your password.
Each additional type of character used in your password significantly increases the pool of possible combinations, making it more challenging for hackers to guess correctly. The more diverse your password, the harder it is for automated hacking tools to break it down.
Unpredictability
Predictability is a password’s worst enemy. Using obvious choices like “password“, “123456” or easily discoverable personal information such as your birthdate, pet’s name, or your name makes the hacker’s job easier. It’s basically like leaving your keys under the doormat; it’s one of the first places a burglar would look.
When creating a password, it’s important to think outside the box and avoid common words or phrases. The more random and unpredictable your password, the less likely a hacker is to guess it. Consider using a phrase or a combination of unrelated words that only make sense to you.
Importance of using unique passwords for each account
Using the same password across multiple accounts is somewhat like using the same key for every lock. If a hacker cracks one password, they may be able to gain access to all your accounts.
Attackers may also use stolen or leaked credentials, also referred to as credential stuffing attacks, to gain unauthorized access to different services. This attack relies on the tendency for users to use the same password across multiple platforms and accounts.
Therefore, implementing a unique password for each account can help limit the damage a hacker can do if they manage to crack one of your passwords. This way, even if one account gets compromised and leaked, the risk to your other accounts is minimized. It’s a simple but vital strategy to protect against credential stuffing attacks.
2. Change your default WordPress login
The default WordPress login URL is a well-known path that hackers often target. By changing this URL you’re concealing the main entry point to your website, making it harder for automated attacks to breach your site.
Why is the default WordPress login URL a risk?
The default WordPress login URL is either yourwpdomain.com/wp-admin or yourdomain.com/wp-login.php. Given that this is the same for every WordPress website, it’s the first place hackers will look when attempting to gain unauthorized access.
Hackers often use attack tools and bots that systematically target these default URLs. So if your login URL is using the default location, your website will be more exposed to these automated attacks. Simply changing it to a new structure will add one more step of complexity for bad actors.
How to change the WordPress login URL
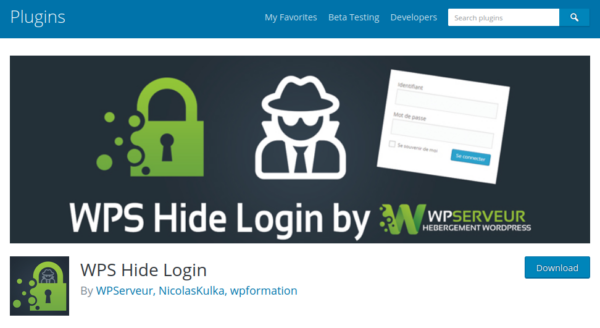
The easiest way to change your WordPress login URL is by using a plugin such as WPS Hide login.
To change your WordPress login URL:
- Go to Plugins > Add New.
- Download, install and activate the WPS Hide Login plugin.
- You will be redirected to the plugin settings page.
- Update your login path to a new URL and save.
Remember, changing your login URL doesn’t make your website invincible to attacks, but it certainly makes it a less attractive target to hackers.
3. Limit login attempts to prevent brute force attacks
By default, WordPress allows unlimited login attempts. This can leave your site vulnerable to brute force and dictionary attacks. However, you can help mitigate this risk by limiting the number of login attempts.
Understanding brute force attacks
In a brute force attack, an attacker uses automated scripts to attempt thousands, or even millions, of username and password combinations in rapid succession. If your WordPress site permits unlimited login attempts, an attacker can continue this guessing game indefinitely, increasing their chances of eventually hitting the right combination and successfully cracking your credentials.
How limiting login attempts can prevent brute force attacks in WordPress
When you limit login attempts in WordPress, the game changes. After a specified number of unsuccessful attempts, the user is temporarily locked out from making further attempts. This lockout period can range from minutes to hours, or even days, depending on how you configure your settings.
This strategy effectively disrupts the brute force attack by introducing significant delays to their process. Instead of making thousands of attempts per minute, an attacker might be reduced to a handful of attempts per hour or even per day. This dramatically lowers their chances of success within a reasonable timeframe, making the attack impractical and less likely to succeed.
How to limit login attempts on WordPress
Any Sucuri client using our website firewall is automatically protected from brute force. We can restrict access to only authorized IP addresses and also have a brute force detection feature that blocks an IP address after too many failed login attempts. However, if you aren’t an active Sucuri client you can also use a WordPress plugin to accomplish similar functionality.
To limit login attempts on your WordPress site, follow these steps:
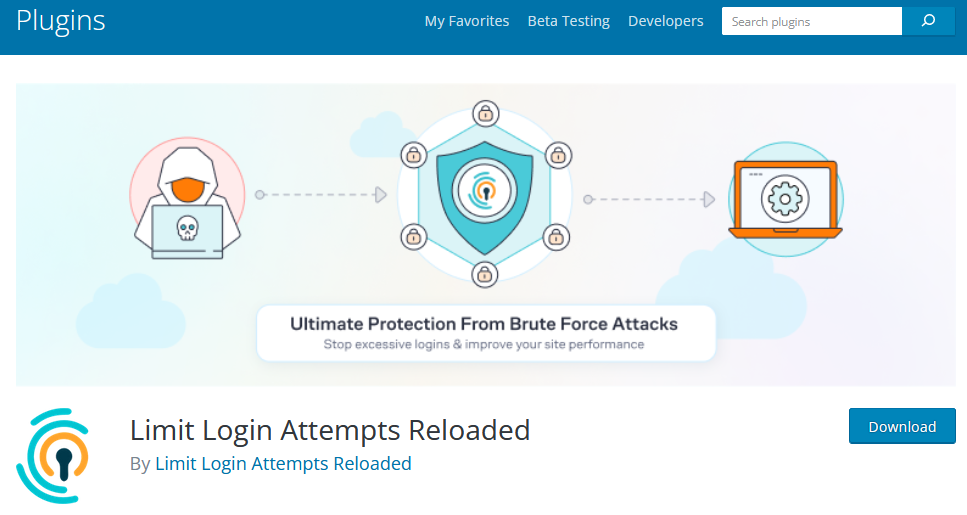
- Install and activate a security plugin that provides login limit functionality. One popular option for this use case is Limit Login Attempts Reloaded.
- Once activated, go to the plugin settings.
- Look for the option to limit login attempts. You’ll typically be able to specify the maximum number of failed attempts before a user is locked out and how long they should be locked out for.
- Save your changes.
 Limiting login attempts is a simple but effective way to protect your WordPress site from brute force attacks.
4. Enable two-factor authentication for WordPress
Two-factor authentication (2FA) adds an extra layer of security to your WordPress site by requiring two types of identification before granting access to your account. This dramatically reduces the chances of unauthorized access to your site, even if your password is compromised.
What is two-factor authentication?
Two-factor authentication is a security measure that requires a user to provide two separate forms of identification to access an account. Typically, this involves something the user knows (like a password) and something the user has (like a unique code sent to their mobile device). Even if a hacker guesses your password, they would still need the second form of authentication to access your account.
Benefits of using two-factor authentication
The primary benefit of two-factor authentication is enhanced security. With 2FA, even if your password is compromised, it’s not enough for a hacker to gain access to your site. This makes it significantly more difficult for unauthorized users to breach your WordPress site, protecting your content and user data from potential cyber threats.
How to enable two-factor authentication on WordPress
If you’re a Sucuri Firewall user, enabling 2FA on your WordPress site is quick and easy.
To configure 2FA for your WordPress login page:
- Navigate to the Firewall’s Protected Pages settings.
- Define the page that you want to protect, such as /wp-login.php or /wp-admin/.
- Select Two Factor Authentication from the drop-down.
- Click on Protect Page.
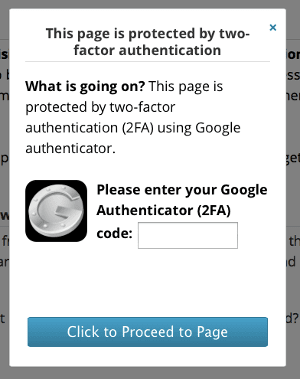
You have now enabled two factor authentication on your site.
You can also use a WordPress plugin to accomplish this functionality on your site. CAPTCHA 4WP is one of many popular options available in the official WordPress plugin repository.
After you’ve installed the plugin, you’ll need to configure it — this is a fairly simple process. Firstly, sign up for an account. Then choose the type of CAPTCHA you want to implement from the plugin settings and apply them to your pages.
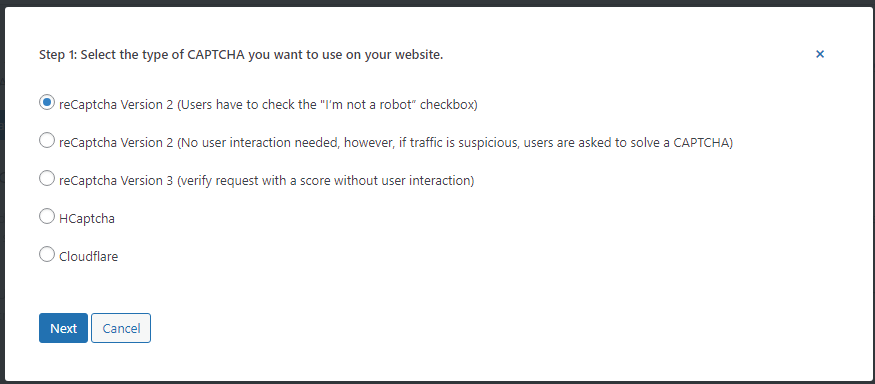 Next, generate site keys for your website. Finally, add these generated API keys into the settings of the CAPTCHA 4WP plugin on your WordPress site.
Regardless of whether you use a firewall or plugin to accomplish the task, by implementing two-factor authentication you make it much harder for hackers to gain unauthorized access. It’s a simple step that can have a big impact on your website’s overall security.
5. Add captcha to your WordPress login page
CAPTCHA is a type of challenge-response test used in computing to determine whether the user is human. Since an enormous number of attacks on WordPress websites are automated, adding a CAPTCHA to your WordPress login page can provide an additional layer of protection against brute force and spam bots.
Understanding how CAPTCHA works
CAPTCHA stands for Completely Automated Public Turing test to tell Computers and Humans Apart. It’s designed to differentiate between human users and bots. The most common type of CAPTCHA involves the user entering a series of distorted letters and numbers that a bot wouldn’t be able to recognize.
Benefits of adding CAPTCHA to your login page
Adding a CAPTCHA to your login page can help protect your WordPress site from automated attacks. Bots are often used in brute force attacks, where they systematically attempt different username and password combinations to gain unauthorized access. By adding a CAPTCHA, you can help ensure that only humans are attempting to log in.
CAPTCHA can also be effective at preventing spam comments, as it stops bots from being able to automatically post comments.
How to add CAPTCHA to your WordPress login
Sucuri firewall users can easily enable a CAPTCHA challenge for any page on their WordPress site, including /wp-login.php or /admin.php.
To enable CAPTCHA on WordPress:
- Log in to the Sucuri dashboard.
- Navigate to Firewall > Access Control > Protected Pages.
- Define the page you want to protect (ie. /wp-login.php) and then select Captcha Challenge from the drop down menu.
- Click Protect Page.
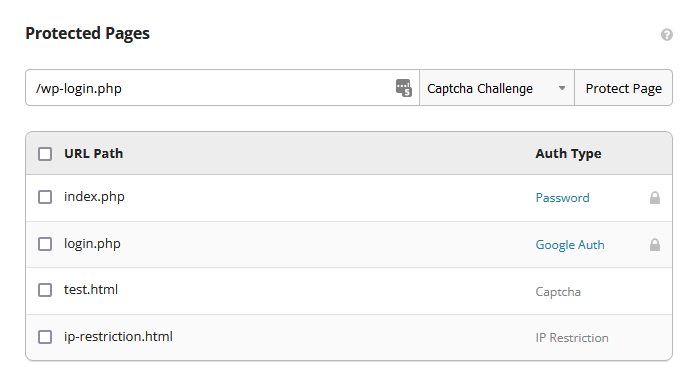
The defined path will be added to your protected pages and secured against automated attacks with the Sucuri firewall. Contact support any time if you require assistance with this feature.
Adding a CAPTCHA challenge to your WordPress login page is also relatively simple with the use of a plugin.
Here’s how to enable CAPTCHA with a plugin:
- Install and activate a CAPTCHA WordPress plugin. A popular option is the CAPTCHA 4WP WordPress plugin.
- Once activated, navigate to the admin console and register your website.
- Add the generated API keys to the plugin settings.
- Configure the settings to your liking and ensure the CAPTCHA is enabled for your WordPress login and user registration pages.
- Save your changes.
By adding a CAPTCHA to your login page, you add another hurdle for potential hackers, making your WordPress site more secure. It’s a simple measure that can be highly effective at deterring automated attacks.
6. Harden your WP-Config file
Another crucial step is to harden your wp-config.php file. This file is like the blueprint of your WordPress site, containing your database connection information and other critical settings. You can add specific security rules to this file to further protect your website.
The importance of hardening WP-Config
Even with all the security measures for your wp-admin panel in place, there’s always a chance that a vulnerable plugin could allow unauthorized admin access or privilege escalation. In such cases, hardening your wp-config file provides an additional layer of protection, frustrating attackers and making their jobs much harder.
Two essential security rules you can add to your wp-config file are disallow_file_edit and disallow_file_mods. Let’s discuss how these rules enhance your WordPress security.
Implementing disallow_file_edit
The disallow_file_edit function prevents attackers from modifying files directly through the wp-admin dashboard. This is a common method used by attackers to insert backdoors into theme or plugin files after compromising wp-admin access.
To implement this function, add the following line to your wp-config file:
define( 'DISALLOW_FILE_EDIT', true );Once this is done, the file editor function in the dashboard will no longer be accessible. Any manual attempts to access the editor will result in a permission error.
The advantage of using disallow_file_edit is that it limits the attacker’s ability to establish backdoor access and deliver their payload. However, it also limits some administrator functionalities.
Implementing disallow_file_mods
The disallow_file_mods function prevents the installation of new plugins from the WordPress repository. This is a common method used by attackers to upload malicious files to your site.
To implement this function, add the following line to your wp-config file:
define( 'DISALLOW_FILE_MODS', true );Once this is enabled, the Add New button will no longer be present on the plugins page from within your admin panel.
Important caveat: While this rule effectively locks down wp-admin, it also limits your ability to perform routine work on the site, such as updating and installing plugins through the dashboard.
However, even with disallow_file_mods enabled, you can still update plugins using WP-CLI. Just remember to run the update command regularly and have a daily backup service in case you need to restore anything.
7. Set a nickname to hide your WordPress username from blog posts
In WordPress, your username and display name are the same by default. This means that if you publish a post, your username is visible to everyone.
If an attacker knows your username, they’re halfway to accessing your account. However, you can easily mitigate this risk by setting a nickname and hiding your login username from blog posts.
How to set a nickname and hide your WordPress login user
Follow these steps to set a nickname and hide your login username from your WordPress blog posts:
- Log into your WordPress dashboard.
- Select Users > Profile to access your profile settings.
- Scroll down to the Name section. Here, you’ll see a field labeled Nickname. Enter the name you’d like to display publicly on your site in this field.
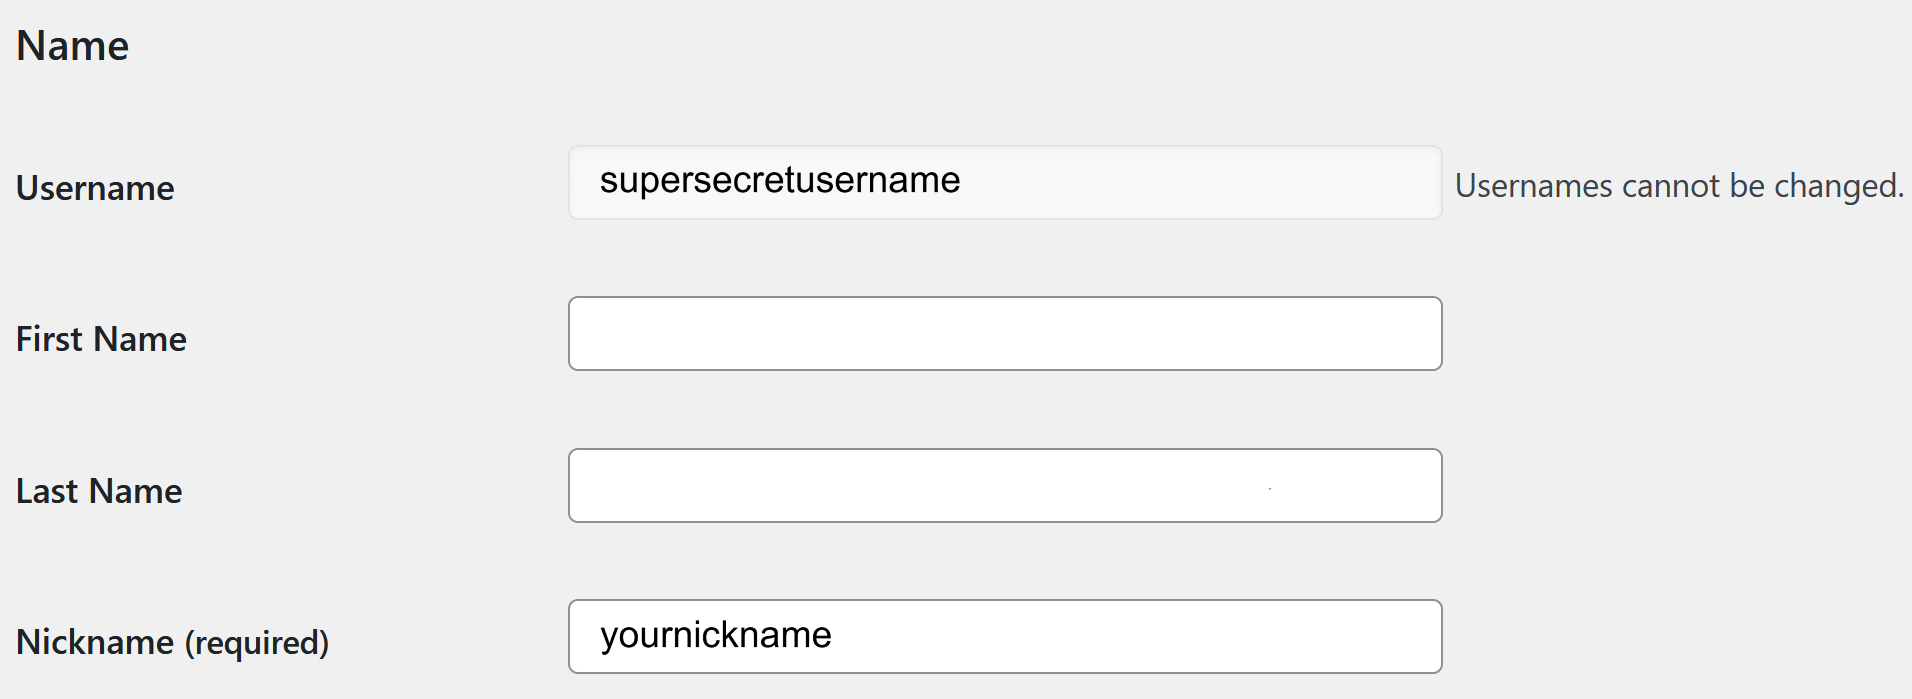
- Once you’ve entered your nickname, go to the Display name publicly as dropdown menu and select your newly created nickname.

- Scroll down and click Update Profile at the bottom of the page to save your changes.
By keeping it public, you’re making it easier for hackers to launch a brute force or dictionary attack. They already have your username; now they only need to guess your password.
While hiding your username doesn’t make your site impervious to attacks, it does add another layer of security by making it harder for attackers to gain access.
8. Clean up and remove old user accounts
If your WordPress site has been around for a while, there’s a good chance you may have some old user accounts. These could be from employees who no longer work for you, contributors who no longer write for you, or test accounts you’ve created. These old user accounts can pose a significant security risk and should be removed.
Why old user accounts can be a security risk
Every user account on your WordPress site is a potential entry point for hackers. Old user accounts, particularly those with administrator or editor privileges, can pose a significant security risk. If these accounts have weak passwords or if their credentials have been compromised, they could be used to gain unauthorized access to your site. Even accounts with lower-level privileges can be a risk as they could be used in a privilege escalation attack.
How to find and remove old WordPress user accounts
Regularly auditing your user accounts and removing any that are no longer needed can help keep your WordPress site secure. Here’s how to do it:
- Log into your WordPress admin dashboard and navigate to the Users section.
- Review the list of users and identify any accounts that are no longer needed. Consider factors such as when they last logged in and what role they have.
- Before removing an account, ensure that any content they’ve created will not be affected. In WordPress, when you delete a user, you can choose to delete all their content or assign it to another user. It’s much safer to assign the content to another user, as removing content might damage your website depending on what that content is.
- To delete a user, simply hover over their username and click Delete. Confirm your decision in the popup that appears.
By regularly cleaning up old user accounts, you reduce the potential entry points for hackers, making your WordPress site more secure. Remember, every account on your site should be necessary and have an appropriate level of access.
9. Delete and remove unused plugins and themes
Plugins and themes are essential for adding functionality and aesthetic appeal to your WordPress site. However, having unused or outdated plugins and themes can expose your site to potential security risks. It’s like leaving unused doors in your house; they might invite intruders even if they’re locked.
Risks posed by unused plugins and themes
Unused or outdated plugins and themes can have vulnerabilities that hackers can exploit to gain unauthorized access to your WordPress site. Even if they’re deactivated, their code still resides on your server, presenting a potential security risk.
Moreover, if these plugins and themes are no longer being updated by their developers, they become even more of a security risk. This is because any vulnerabilities in their code will remain unpatched, making them an easy target for hackers.
How to find and delete unused plugins and themes
To ensure your WordPress site remains secure, you’ll want to regularly audit your plugins and themes and remove any that are no longer in use or updated.
Here’s how to do it:
- First make a backup of your website (both files and database).
- Log into your WordPress admin dashboard and navigate to the Plugins section.
- From here, you’ll see a list of all installed plugins detected in your WordPress environment. Review this list and identify any plugins you no longer use.
- For each unused plugin, click Deactivate (if it’s active) and then Delete.
- Repeat this process in the Themes section for any themes you’re not actively using.
Remember, less is more when it comes to plugins and themes.
10. Update WordPress core, plugins, themes and other components
Keeping your website software updated with the latest security patches is a critical step to protecting your website from hackers. This includes WordPress core along with all plugins, themes, and other third-party components you may have installed on your site.
The risks of exploitable software vulnerabilities
Since hackers often use automated tools to detect and exploit vulnerabilities in outdated or unpatched software, this makes software vulnerabilities one of the leading ways websites get infected.
One prime example of the risk posed by software vulnerabilities is the Balada Injector malware campaign. In the first half of 2023, this campaign affected more than 60,000 sites with obfuscated scripts. It also pointed external script tags to known malicious domains on another 80,000+ sites. Some sites were victim to both types of attacks simultaneously.
Balada Injector was among the top infections that Sucuri’s remediation team had to deal with in 2023. This malware redirects site visitors to scams, ads, and other malicious resources. It gained momentum in May, 2023 by exploiting a vulnerability in the popular WordPress plugin Essential Addons for Elementor.
The Balada Injector campaign typically appends malicious JavaScript injections to legitimate .js files or injects them into the header or footer of a page. This triggers the malicious injections with each page load, redirecting traffic to the attacker’s intended destination.
This malware clearly highlights the value of keeping your website software patched to help mitigate risk.
Managing WordPress plugins and themes
One effective way to manage your WordPress plugins and themes is by using WP-CLI, a command-line tool specifically designed for WordPress. WP-CLI can help you securely manage your WordPress installation, including updating and patching your plugins and themes.
For additional guidance, check out this short video tutorial we’ve prepared to help you through the process. Enjoy!
Virtual patching WordPress with a Web Application Firewall (WAF)
If you struggle to quickly respond to updates and patch your website software, a web application firewall can be an especially valuable tool. A firewall can help virtually patch known vulnerabilities, offering protection against common threats like cross-site scripting and SQL injection attacks.
Securing your WordPress website and login page from hackers
Protecting your WordPress login page from potential threats is a multifaceted task, but it’s entirely achievable with the right approach.
The WordPress login page is a high-value target for cybercriminals. Changing the default login URL, limiting login attempts, and enabling two-factor authentication are just some of the ways to safeguard it. Additionally, it’s essential to clean up your website by removing unused plugins, themes, and old user accounts, as these could potentially be exploited by attackers.
Leveraging a website firewall and installing a WordPress security plugin are also effective measures to monitor and secure your WordPress website.
By following these steps, you can make your WordPress login page less attractive to attackers and better protect them against various website threats and malware. Remember, every effort you make towards securing your website helps protect your website visitors and rankings, too!